
In 2024, How to Bypass Google FRP Lock from Itel P40 Devices

How to Bypass Google FRP Lock on Itel P40 Devices
Technological advancements in the IT and telecommunication industry simplify your tasks and provide security against cyber malpractices. The advantages are numerous and appealing, but there are downsides too. One such inconvenience is caused by Google FRP lock in Itel P40 smartphones. The facility keeps your device information safe against unauthorized access. However, users often report issues like lockouts not being removed due to several causes. Such scenarios raise the demand for Itel P40 Nord FRP bypass solutions for seamless device access.
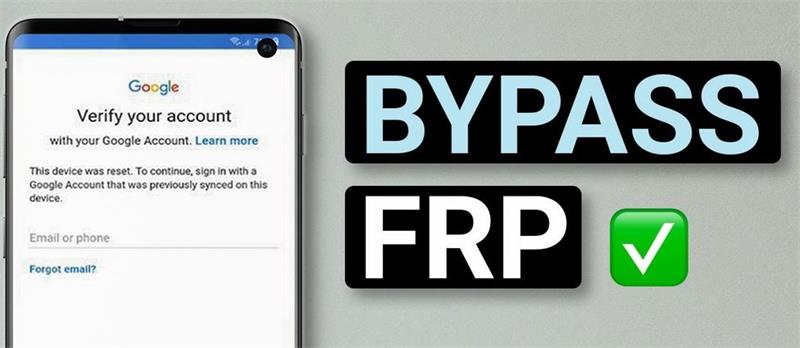
Part 1. What Is Google FRP and How Does It Work?
Google Factory Reset Protection (FRP) is an in-built security function in Android 5.1 and later versions. The feature protects these devices against intentional data loss on unauthorized access. The utility does not allow a factory reset of your device in case it is lost or stolen. Your data is hence, safe from unwanted mishandling. The feature also protects the Itel P40 device’s data encryptions and screen locks. The functionality gets enabled when you register a Google account on your Android device. As is obvious, the feature gets disabled when the Google account is removed before beginning the Factory Data Reset process.
If your device is under untrusted access and the FRP lock is enabled, the latter will prevent the factory reset of your phone. It is because; the active FRP lock requires entering the Google account credentials registered with the Itel P40 device. Therefore, unwanted users will not be possible to factory reset the Itel P40 phone. However, there may be instances when you need to factory reset your FRP-enabled device to its default settings. Ensure that the registered Google account credentials are available to you under such circumstances.
Part 2. How to Remove Google FRP Lock on Any Itel P40 Phone?
To remove the Google FRP lock on your Itel P40 device, you can follow any of the methods discussed below:
1. Bypass Google FRP Lock on Your Itel P40 Phone
- Switch on the Wi-Fi network of the Itel P40 phone and head to the ‘Hello’ screen.
- Take the following path:
Emergency Call> Emergency Rescue> Add Contact

- When the permission prompt pops up, click on ‘Deny’ and tap “Go to Settings”.
- Hit the ‘Permission’ tab and tap the ‘Search’ button.
- Enter ‘Settings’ in the search field, choose the ‘Settings App Info’ option, and tap the ‘Open’ button.
- Take the path given below to enable the system shortcuts:
System> Accessibility> Accessibility Menu> Toggle the Button to Turn it On> Allow> Got it
- Head to the “Settings” app and tap “Apps and Notifications”. Next, click on “See All Apps”.
- Find and disable the ‘Android Setup’ and ‘Google Play Service’ within the application list.

- Navigate back to the ‘Hello’ screen to completely disable the setup by taking the following path:
Start> Agree> Agree> Skip> Don’t Copy> Ok> Agree
- Skip the ‘Set Screen Lock’ task for completing the setup.
2. Using FRP Bypass APK
This is a quick and smart way to address the FRP lock removal issue within several minutes. Here’s what you need to do:
- Download the FRP Bypass APK to a PC or some other smartphone from the latter’s official website, followed by copying it into a pen drive.
- Use an OTG to connect the pen drive to the FRP-locked device.
- Head to the destination folder of the downloaded APK in the “File Manager” application.
- Install the APK in the FRP-locked phone by allowing the app permissions.
- Navigate to ‘Settings’ and enable the ‘Install from Unknown Source’ option.
- Reinstall and open the APK.
- The ‘Settings’ menu will pop up. Head to the “Backup and Reset” option.
- Click on ‘Factory Data Reset’, followed by “Erase Everything”.
- Tap ‘Confirm’ to erase all the Itel P40 device data.
- Register with a new Google account to use the phone.

3. Deactivate FRP in Your Itel P40 Phone
Removing the Google FRP lock using a computer is impossible in some instances. Deleting your registered Gmail account from the Itel P40 device can help you in these circumstances. The downside of this method is that your device’s data will lose protection from Google. Here’s how you can delete your Gmail account from the FRP-locked phone:
- Launch the “Settings” app on your Itel P40 device.

- In the app’s opening interface, click on the ‘Accounts’ tab to open the section.

- A list of all the accounts linked to your Itel P40 device will be displayed. Tap on the desired Gmail account to unlink it from your phone.

- The device data linked with the selected account will appear on the screen. Click on ‘Remove Account’ to proceed further.

- A confirmation prompt will pop up to ensure a willful deletion of the account from the Itel P40 device. Tap on ‘Remove Account’ to confirm the action. This will cause all data linked with the account to get deleted from the phone.

FAQs about Google Lock Bypass
1. Does Factory Reset Remove Google Account?
There may be instances when you require wiping out smartphone data to keep it safe against unauthorized access. Maybe you wish to pass on your device to another user or migrate to a different device. It is important to make sure that all accounts linked to the phone are deleted from the Itel P40 device. It should be understood here that a factory reset will not remove Google or other accounts from the Itel P40 device. The process restores the default factory settings of the phone that you got at the first purchase.
2. How to Enable Factory Reset Protection?
Enabling the Factory Reset protection feature is a smart way to protect the important data on your phone. However, issues of unethical access in cases of theft or loss are quite prominent. You can enable the FRP functionality by taking the following steps:
- When using a new device, sign in to the phone with your Google account. You can use an existing account or create a new one.
- Set a pattern or password screen lock on your device. It is not advisable to use swipe unlock or leave the phone unlocked at all. If you forget the pattern or password, Google credentials can be used to unlock the Itel P40 device.
These steps will cause the automatic configuration of the Factory Reset Protection feature. The invader will be prompted to enter the registered Google account credentials on every attempt to access the phone.
Conclusion
Developments in electronic technology have brought a series of benefits, covering easy access, security, and everything in between. One such feature is the Google Factory Reset Protection to protect your device data against untrusted access. The feature is undoubtedly credible, but there may be situations that require bypassing the FRP lock. For affordable solutions to address the concern on Itel P40 phones, pick the one that corresponds to your specific situation.
Dr.Fone - Screen Unlock (Android)
Unlock Your Itel P40 Phone in a Flash
- Remove 5 screen lock types: pattern, PIN, password, ingerprints & Face ID.
- Bypass Android FRP lock without a PIN or Google account.

- Unlock mainstream Android brands like Samsung, Huawei, LG, Xiaomi, etc.
- No tech knowledge required, Simple, click-through, process.
3,981,454 people have downloaded it
How to Bypass FRP on Itel P40?
Learning how to FRP bypass on Itel P40 is vital in many ways. For instance, you might want to hard reset your phone to clear data and remove a bug or virus. Or, you may want to remove every bit of information before gifting or selling the phone. Whichever the case, learning how to bypass FRP on Itel P40 is a cakewalk with this 3-minute read. We’ll know how to do that with or without a PC.
Part 1: Is it possible to bypass FRP Itel P40 on Samsung?
FRP (Factory Reset Protection) is an Activation Lock system introduced by Google in 2015 on Android 5.1 (Lollipop) or newer. This security feature is meant to prevent unauthorized Factory Resetting of your phone. In other words, you’ll need to enter the correct Google Account details to bypass FRP. Because FRP or Activation Lock is available on Android 5.1 or later, it will automatically activate on your Itel P40 device after adding your Gmail account. Some Samsung Itel P40 devices include S8, S8 Plus, Note 8, Note 9, J6, J7, M1, and other Galaxy phones launched before 2018.
Meanwhile, you must be asking if it’s possible to bypass FRP on Itel P40 without a PC? The answer is yes! There are multiple methods to bypass FRP on Itel P40, including via YouTube.
Below are the quick steps for Galaxy S8 or S8 Plus:
Step 1: Dial an emergency number and save it
- 1. Fire up your locked phone and connect it to a Wi-Fi network.
- 2. Navigate back to the “Let’s go” screen and tap Emergency call. Dial and call 112.
- 3. Go back to the “Let’s go” screen and click Next until you reach the Wi-Fi connection screen. Here, tap Add network and then click the Settings icon on the Samsung keyboard.
- 4. Click Keyboard layout and feedback > Key-tap feedback. Then, choose Sound and vibration on the Tip section.
- 5. Next, click Answering and ending calls > Answer automatically. Now enable the toggle before using your two fingers to select “10 seconds” and “Customize.” You’ll see a pop-up dialog where you’ll click App Info > Call settings > Block numbers.
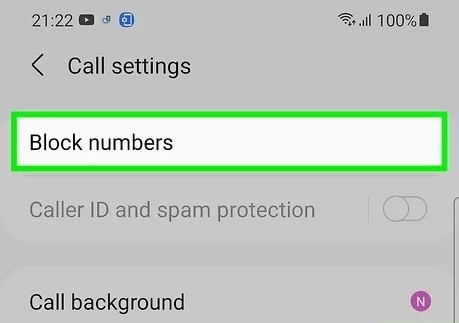
- 6. Click Recent > Emergency number > Message icon.
- 7. Tap the Ellipsis icon and click Add or remove people. Enter random numbers before clicking the “+” button.
- 8. Click the number you’ve just entered and tap Add. Then, tap Create contact and name it. Scroll down and add an email address with a password that you’ll remember easily if prompted. Click Save.
Step 2: Open Chrome and install Bypass FRP APK
- 9. Now open a Message chat and type www.youtube.com before sending it to the number. Then, tap the YouTube link and open any video.
- 10. Click any link on the video description to launch Google Chrome. Search, download, and install Apex Launcher APK from frpfile.com.
- 11. After installing Apex Launcher, open it and then click Settings > Biometrics and security > Other security settings > Device admin apps > Find my Device > Deactivate.
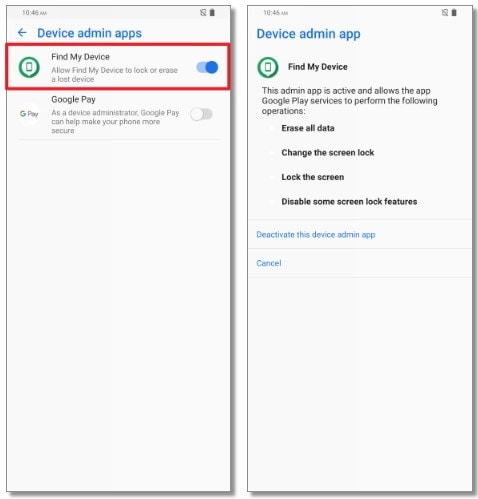
- 12. Go back to the Settings screen, click Apps > Google Play Services > Disable. Also, disable Google Account Manager.
- 13. Open Chrome and install Bypass FRP APK from the same website.
Step 3: FRP Bypass Itel P40
- 14. Go to Settings > Accounts and backup > Accounts > Add account > Google. Sign in with any Gmail account.
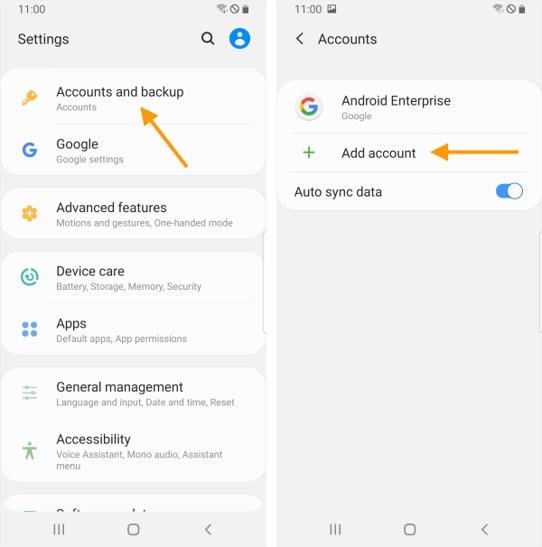
- 15. Navigate back to Settings and enable Google Play Services. Also, activate Find My Device. Now restart your phone and access it without FRP.
Although this method can yield the desired results, it can be time-consuming and confusing if you’re not a techie. So, read on to learn the easiest way to bypass FRP on any Samsung Itel P40 device.
Part 2: How to bypass FRP Itel P40 with Dr.Fone – Screen Unlock (Android)?
This method will teach us how to bypass FRP on Itel P40 devices like Galaxy S8 or S8 Plus. Here, you’ll need a Wi-Fi internet, Mac or Windows PC, and a USB wire. You require a computer to install Dr.Fone - Screen Unlock (Android) and connect the program to your locked phone. Don’t worry; it’s a free FRP bypass program without those unwanted programs or malware. Besides Itel P40, Dr.Fone can also bypass Samsung FRP on Android 6/7/8/10/11/12/13.

Dr.Fone - Screen Unlock (Android)
The Best Tool to Bypass FRP on Itel P40 and Solve Your Screen Locks!
- Completely unlinked from the previous Google account, it won’t be traced or blocked by it anymore.
- Remove all Android screen locks (PIN/pattern/fingerprints/face ID) in minutes.
- Supported Android brands: Samsung, Xiaomi, Redmi, Oppo, Realme, Vivo.
- Provide specific removal solutions to promise good success rate.
4,008,670 people have downloaded it
Follow these steps to bypass FRP on Itel P40 with Dr.Fone:
Step 1: Install and run Dr.Fone on your PC and open the Screen Unlock feature. On the Screen Unlock window, tap Android before clicking Remove Google FRP Lock.

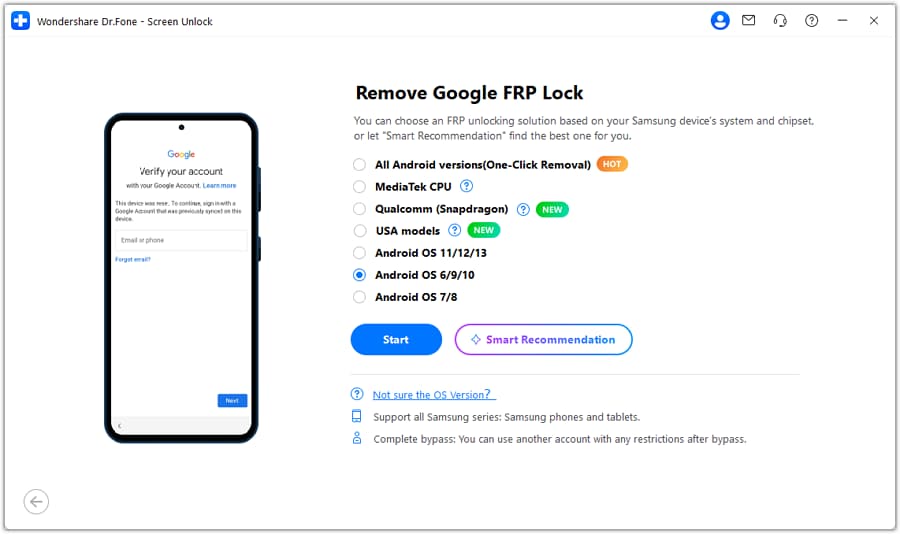
Step 2: Next, choose the Android operating system for your device. In this case, select Android 6/9/10. Now connect the locked Android phone to your PC using a USB cable and click Confirmed once the connection is successful.
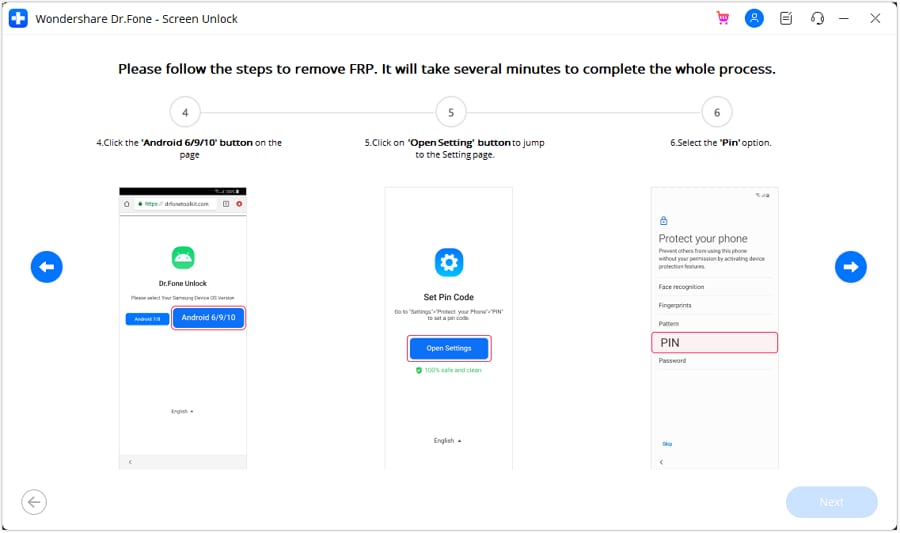
Step 3: On your phone, you’ll see a Dr.Fone Unlock pop-up dialog. Click View and then install and launch Samsung Internet Browser. Now enter and search for https://drfonetoolkit.com . Click Android 6/9/10 and then tap Open Settings. After that, tap PIN > Do not require > Continue. Now set a PIN code that you can easily remember before clicking Skip.
Step 5: Click the “<” button to navigate back to the Wi-Fi connection screen before clicking Next. Enter the PIN you can set earlier before clicking Continue.

Step 6: Hit the Skip button on the Google Sign-In page to successfully bypass FRP on your Samsung Itel P40 phone. And there it that!
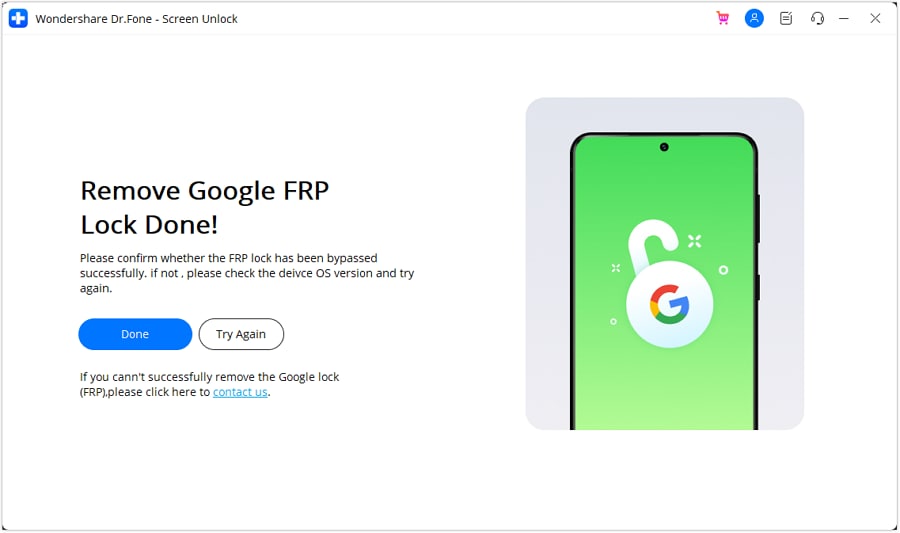
Note: Bypassing FRP on your Samsung phone using Dr.Fone is undoubtedly quick and easy. However, only use this software to bypass FRP on your Samsung phone or if you have consent from the original owner. Don’t bypass FRP if you’re not sure about the original owner of the phone.
You can watch the video below to get your FRP bypassed with Wondershare Dr.Fone
Part 3: How to Disable FRP lock on Samsung Itel P40?
To avoid the stress of bypassing FRP on your Samsung phone in the future, you may have to disable Android Lock altogether. This is a relatively straightforward procedure on any Android phone you use. But be guided that turning off FRP on your Itel P40 phone is not recommended.
Follow these steps:
- Step 1: Search for the Settings app and open it.
- Step 2: Next, click Accounts and backup before clicking Accounts.
- Step 3: You’ll see all the linked email accounts. Choose the one that you want to delete.
- Step 4: Click Remove Account and then click Remove Account once again to confirm. That’s it!
Conclusion
See, you can quickly bypass FRP on Itel P40 with these methods. But remember that disabling FRP will leave your phone without security protection. Also, bypassing FRP using the YouTube method can be lengthy and complex. So, use Wondershare Dr.Fone to skip FRP on Android 6/7/8/9/10/11/12/13. Give it a try!
5 Quick Methods to Bypass Itel P40 FRP
Google Factory Reset Protection, a.k.a FRP, is developed by Google for all Android phones. It adds an extra layer of security to your phone and the data on it. It is aimed at making it difficult for the illegal holder of your phone to factory reset your phone and remove tracking information. Then why do we need to discuss the Itel P40 FRP bypass?
Though the protection is meant for you, sometimes you may forget the password and want your Itel P40 FRP removed. Also, if you bought a used phone and the previous user has set up FRP with her password, you need to bypass it.
Part 1: In what cases does the Itel P40 FRP bypass works?
How and why should I bypass Itel P40 FRP? Let us look at the valid reasons.
1. Buy a locked second-hand Itel
When you buy a second-hand phone, ideally, the previous user must format and hard reset the Itel phone to remove all locks and password requirements. However, if it doesn’t happen, you cannot use some options on your phone and configure security because of FRP. Here, your savior is the option of the Itel P40 FRP bypass.
2. Forget Google account ID and password
Even if you have locked your Itel phone yourself, you are stuck when you forget your Google username and password. So, you can only recover your phone using the Itel P40 FRP bypass.
3. The person with a Itel from his company no longer works for it
Some employees also receive official phones from their company which they have to return when they leave the company. Now, it becomes a horror story for the new employee if he gets the same phone locked with the previous user’s ID.
Part 2: 5 quick methods to bypass Itel P40 FRP
Ok, now this is established that there are certain situations when you need to conduct a Itel P40 FRP bypass. So how do you do the Itel P40 FRP bypass?
Method 1. Retrieve your Google account from another device
If your phone is locked with a Google account whose password you do not know or have forgotten, then you can use this method to Itel P40 FRP bypass. In this method, you can try to retrieve your Google account from another device. It is a simple step-by-step process tha can be completed from a PC or another mobile device.
If you have forgot the email address but remember the password, then follow these steps.
- Navigate to Google’s Find My Email page in your browser.
When you can’t remember the email address that was configured, go to the Find My Email page and start account recovery process.
- Enter your recovery email or phone number
On the next screen, provide a recovery email or phone number and click Next.

- Provide your first and last name
Enter your first and last name in the given form and click Next.
- Verification code
Google will send a verification code to the setup recovery email or phone number, click Send.
- Verification code entry
Check your email inbox or phone messages depending on the recovery method and find the verification code. Enter it in the given form. If it is correct, you can go to the next final step.
- Choose an account
From the list of accounts showing on the screen, select the account you want to recover.
- Enter your password
Enter the password in the text box and you are done.
If you remember the email but not the password, then the Itel P40 FRP bypass method will go like this.
- Google’s Account Recovery page
Navigate to the Account Recovery page from the browser on your PC or other mobile devices.
- Enter your email address
Fill in the form with your Google account and click Next.

- Enter the last password you remember
The next form will ask you to enter the last password you remember and that worked
Now, you will receive a message to your registered device, to verify it’s you. Open it and click , Yes, it is me.
Now, wait for six hours for Google to verify it’s you and then they will send a password reset link to your email.
Now, what if you can’t remember your last password, then use the next method.
- Click on “Try another way”
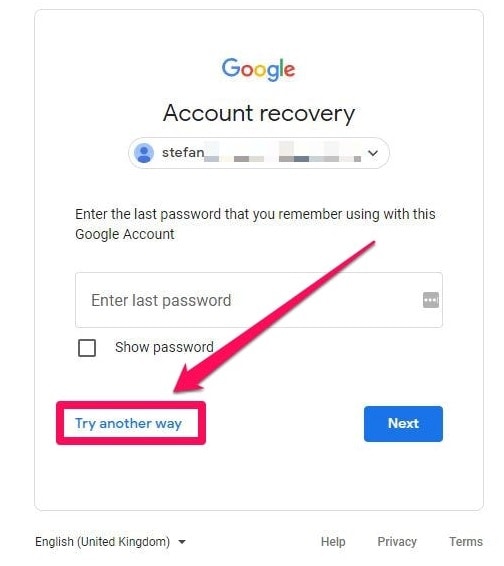
Now Google will send a message to your phone to verify it’s you. On your phone, open the message and click Yes, it’s me.
After verification, Google will send you a password reset link after six hours.
If your phone is not registered in your Google account then, try the next method.
- Click on “Try another way” again

If your phone is enabled to check for the code, click Try another way again.
Google will then ask you to send a verification code to your registered phone number. Click Send.
Find the code from your messages, enter it, and click Next.
Now again, you will wait for six hours till Google sends the password reset link to your email.
Method 2. Use FRP Bypass APK
FRP bypass APK is another tool you can use to Itel P40 FRP bypass easily. Let us see how it works step by step.
- Download FRP Bypass APK for Itel P40 FRP bypass android 11.
- Once it’s downloaded, open the File Manager using the Open Files app
- Find the suitable Apk and click on it
- Install & open the APK.
- Open the browser on your phone.
- Launch any of these two below URL.
- Go to the FRP bypass APK >FRP APPS section
- Open Settings leading to the Itel P40 device Settings>System Settings> Backup & Reset >Reset Phone
- Now click on Reset System Settings Only, and confirm Reset System Settings Only.
- Select Erase All data and confirm.
- Your device will be rebooted.
- Wait till the factory reset process completes.
Now, reboot your device and set it up according to your requirements.
Method 3. Deactivate FRP
Another way to come around Itel P40 FRP bypass is to deactivate FRP. Let us follow the step-by-step process.
- Launch the “Settings” app and scroll to the Apps.
- Click on the “Manage apps” (applications) and then the “All” tab.
- Open “Google App.”
- Click on the “Clear cache” to remove the Google account cache.

- Also, clear all data to erase data stored.
- Click the “Back” button, and go to “Gmail.”
- Click on the “Clear cache” and “Clear data.”

- In the Itel P40 device Settings menu and click “Data synchronization.” When your device asks you to enter your Google account, enter your new Gmail account.
You have successfully completed the Itel P40 FRP bypass process.
Method 4. Bypass with SideSync
You can use SideSync to share the screen and data between your computer and mobile phone. How can we use this for FRP bypass?
- Download the SideSync from the official site and install the SideSync application on your computer.

- Connect your phone and computer to the Google account verification screen.
- Now plug in the first end of your OTG adapter with your phone and connect another end to the flash drive with APK.
- Your phone will launch the file explorer automatically, showing the root directory of the flash drive.
- Now click on the APK file.
- Click Settings and allow to install from Unknown sources, and click OK.
- After installation, open SideSync.
- Disconnect the OTG cable from your Samsung phone.
- Now access the Settings menu and go to the Backup & reset option and conduct a factory reset.
Method 5. 3 Steps to Bypass Itel FRP Bypass
Dr.Fone - Screen Unlock (Android) is a reliable and efficient tool designed to help users bypass FRP (Factory Reset Protection) locks on Android devices, including Itel smartphones. This powerful software provides a hassle-free solution for those locked out of their Itel devices due to FRP lock. With its user-friendly interface and advanced features, Dr.Fone makes FRP bypassing a straightforward process, even for users with limited technical knowledge.
Dr.Fone - Screen Unlock (Android)
Remove Google Lock (FRP) from Itel Devices
- Pattern, PIN, password, fingerprints & face screen lock can all be unlocked.
- Bypass Android FRP lock without a PIN or Google account.

- Unlock mainstream Android brands like Samsung, Itel, Xiaomi, etc.
- No tech knowledge required, Simple, click-through, process.
3,981,454 people have downloaded it
3 Steps to Bypass Itel FRP Lock with Dr.Fone - Screen Unlock (Android)
- Step 1. After installing Dr.Fone - Screen Unlock (Android), launch the program and select the “Screen Unlock” option from the main menu. Continue to Android > Remove Google FRP Lock.

- Step 2. Then select Itel and click the Start button to continue. Then, connect your locked Itel device to the computer using a USB cable. Ensure that USB debugging is enabled on your Itel device before proceeding with the next steps.
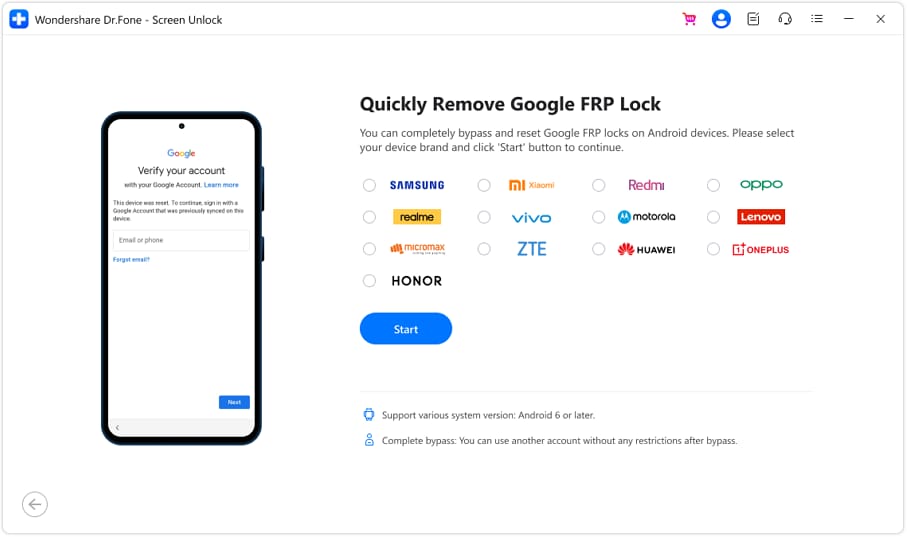
- Step 3. Once your Itel device is successfully connected, Dr.Fone - Screen Unlock (Android) will automatically detect it. Follow the on-screen instructions to put your Itel device into specic mode. Once in the correct mode, Dr.Fone will start downloading the necessary firmware to bypass the FRP lock.
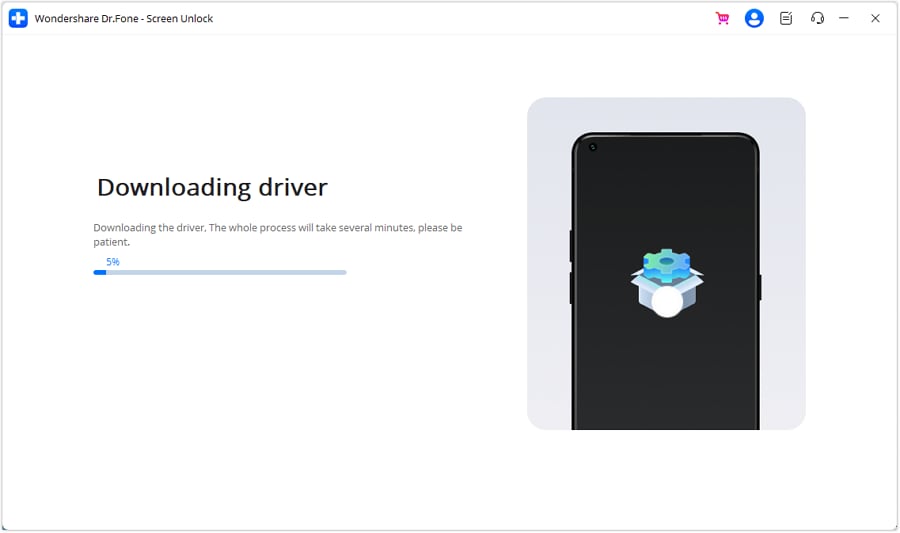
During the process, it’s crucial to keep your device connected to the computer and refrain from disconnecting it until the bypass is complete. After the firmware download is finished, Dr.Fone will initiate the FRP lock bypass process. Once completed, your Itel device will restart, and you’ll regain access to it without encountering the FRP lock.

The Bottom Line
FRP is a great feature to add security to Android phones. However, sometimes it is necessary to bypass it to fully use your phone. When you are stuck with an FRP lock, it is a frustrating situation, especially when you want to factory reset your phone. We have described various methods so that you choose the best solution according to your requirements for the Itel P40 FRP bypass. Among them, bypassing Itel FRP lock is made simple and efficient with Dr.Fone - Screen Unlock (Android). Say goodbye to FRP lock frustrations and regain access to your Itel device swiftly with Dr.Fone - Screen Unlock (Android) .

Also read:
- [New] Stand Out as an Elite Gamer on Youtube for 2024
- [Updated] Evaluating Visual Dynamics The Power of Luminance's HDR
- [Updated] Masterclass in Timelapse Capture via GoPro Studio for 2024
- [Updated] Optimizing Ad Revenue on YouTube with New Strategies
- [Updated] Secrets of Bulk Downloads Maximizing Your TikTok Video Collection
- How Can We Bypass Honor 90 Pro FRP?
- In 2024, AddROM Bypass An Android Tool to Unlock FRP Lock Screen For your Infinix Hot 40 Pro
- In 2024, How to Bypass FRP on Infinix Hot 40?
- In 2024, How To Bypass Vivo Y27 5G FRP In 3 Different Ways
- In 2024, How To Bypass Vivo Y77t FRP In 3 Different Ways
- In 2024, Ultimate Guide from Xiaomi Redmi K70 Pro FRP Bypass
- Mastering Plumbers in Pixels: Top 6 Super Mario Games for Your PC Odyssey
- New 8 Popular Streaming Audio Recorder That You Should Know for 2024
- Solutions to Spy on Honor Magic V2 with and without jailbreak | Dr.fone
- Tailored to You: Engage with 8 Specialized AI Tools
- Title: In 2024, How to Bypass Google FRP Lock from Itel P40 Devices
- Author: Lynn
- Created at : 2024-12-16 20:31:46
- Updated at : 2024-12-22 02:38:37
- Link: https://bypass-frp.techidaily.com/in-2024-how-to-bypass-google-frp-lock-from-itel-p40-devices-by-drfone-android/
- License: This work is licensed under CC BY-NC-SA 4.0.
