
In 2024, 5 Quick Methods to Bypass Itel P40+ FRP

5 Quick Methods to Bypass Itel P40+ FRP
Google Factory Reset Protection, a.k.a FRP, is developed by Google for all Android phones. It adds an extra layer of security to your phone and the data on it. It is aimed at making it difficult for the illegal holder of your phone to factory reset your phone and remove tracking information. Then why do we need to discuss the Itel P40+ FRP bypass?
Though the protection is meant for you, sometimes you may forget the password and want your Itel P40+ FRP removed. Also, if you bought a used phone and the previous user has set up FRP with her password, you need to bypass it.
Part 1: In what cases does the Itel P40+ FRP bypass works?
How and why should I bypass Itel P40+ FRP? Let us look at the valid reasons.
1. Buy a locked second-hand Itel
When you buy a second-hand phone, ideally, the previous user must format and hard reset the Itel phone to remove all locks and password requirements. However, if it doesn’t happen, you cannot use some options on your phone and configure security because of FRP. Here, your savior is the option of the Itel P40+ FRP bypass.
2. Forget Google account ID and password
Even if you have locked your Itel phone yourself, you are stuck when you forget your Google username and password. So, you can only recover your phone using the Itel P40+ FRP bypass.
3. The person with a Itel from his company no longer works for it
Some employees also receive official phones from their company which they have to return when they leave the company. Now, it becomes a horror story for the new employee if he gets the same phone locked with the previous user’s ID.
Part 2: 5 quick methods to bypass Itel P40+ FRP
Ok, now this is established that there are certain situations when you need to conduct a Itel P40+ FRP bypass. So how do you do the Itel P40+ FRP bypass?
Method 1. Retrieve your Google account from another device
If your phone is locked with a Google account whose password you do not know or have forgotten, then you can use this method to Itel P40+ FRP bypass. In this method, you can try to retrieve your Google account from another device. It is a simple step-by-step process tha can be completed from a PC or another mobile device.
If you have forgot the email address but remember the password, then follow these steps.
- Navigate to Google’s Find My Email page in your browser.
When you can’t remember the email address that was configured, go to the Find My Email page and start account recovery process.
- Enter your recovery email or phone number
On the next screen, provide a recovery email or phone number and click Next.

- Provide your first and last name
Enter your first and last name in the given form and click Next.
- Verification code
Google will send a verification code to the setup recovery email or phone number, click Send.
- Verification code entry
Check your email inbox or phone messages depending on the recovery method and find the verification code. Enter it in the given form. If it is correct, you can go to the next final step.
- Choose an account
From the list of accounts showing on the screen, select the account you want to recover.
- Enter your password
Enter the password in the text box and you are done.
If you remember the email but not the password, then the Itel P40+ FRP bypass method will go like this.
- Google’s Account Recovery page
Navigate to the Account Recovery page from the browser on your PC or other mobile devices.
- Enter your email address
Fill in the form with your Google account and click Next.

- Enter the last password you remember
The next form will ask you to enter the last password you remember and that worked
Now, you will receive a message to your registered device, to verify it’s you. Open it and click , Yes, it is me.
Now, wait for six hours for Google to verify it’s you and then they will send a password reset link to your email.
Now, what if you can’t remember your last password, then use the next method.
- Click on “Try another way”
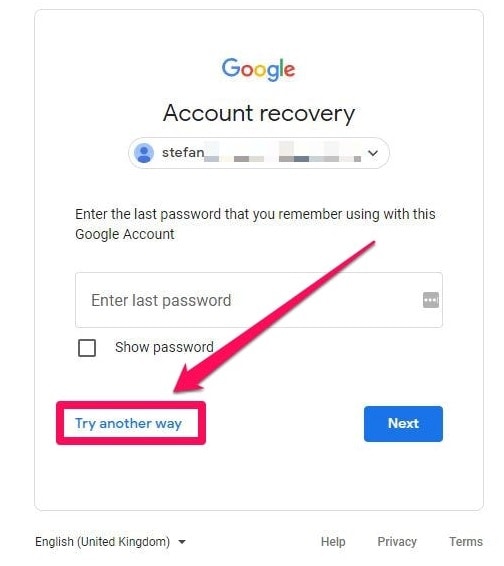
Now Google will send a message to your phone to verify it’s you. On your phone, open the message and click Yes, it’s me.
After verification, Google will send you a password reset link after six hours.
If your phone is not registered in your Google account then, try the next method.
- Click on “Try another way” again

If your phone is enabled to check for the code, click Try another way again.
Google will then ask you to send a verification code to your registered phone number. Click Send.
Find the code from your messages, enter it, and click Next.
Now again, you will wait for six hours till Google sends the password reset link to your email.
Method 2. Use FRP Bypass APK
FRP bypass APK is another tool you can use to Itel P40+ FRP bypass easily. Let us see how it works step by step.
- Download FRP Bypass APK for Itel P40+ FRP bypass android 11.
- Once it’s downloaded, open the File Manager using the Open Files app
- Find the suitable Apk and click on it
- Install & open the APK.
- Open the browser on your phone.
- Launch any of these two below URL.
- Go to the FRP bypass APK >FRP APPS section
- Open Settings leading to the Itel P40+ device Settings>System Settings> Backup & Reset >Reset Phone
- Now click on Reset System Settings Only, and confirm Reset System Settings Only.
- Select Erase All data and confirm.
- Your device will be rebooted.
- Wait till the factory reset process completes.
Now, reboot your device and set it up according to your requirements.
Method 3. Deactivate FRP
Another way to come around Itel P40+ FRP bypass is to deactivate FRP. Let us follow the step-by-step process.
- Launch the “Settings” app and scroll to the Apps.
- Click on the “Manage apps” (applications) and then the “All” tab.
- Open “Google App.”
- Click on the “Clear cache” to remove the Google account cache.

- Also, clear all data to erase data stored.
- Click the “Back” button, and go to “Gmail.”
- Click on the “Clear cache” and “Clear data.”

- In the Itel P40+ device Settings menu and click “Data synchronization.” When your device asks you to enter your Google account, enter your new Gmail account.
You have successfully completed the Itel P40+ FRP bypass process.
Method 4. Bypass with SideSync
You can use SideSync to share the screen and data between your computer and mobile phone. How can we use this for FRP bypass?
- Download the SideSync from the official site and install the SideSync application on your computer.

- Connect your phone and computer to the Google account verification screen.
- Now plug in the first end of your OTG adapter with your phone and connect another end to the flash drive with APK.
- Your phone will launch the file explorer automatically, showing the root directory of the flash drive.
- Now click on the APK file.
- Click Settings and allow to install from Unknown sources, and click OK.
- After installation, open SideSync.
- Disconnect the OTG cable from your Samsung phone.
- Now access the Settings menu and go to the Backup & reset option and conduct a factory reset.
Method 5. 3 Steps to Bypass Itel FRP Bypass
Dr.Fone - Screen Unlock (Android) is a reliable and efficient tool designed to help users bypass FRP (Factory Reset Protection) locks on Android devices, including Itel smartphones. This powerful software provides a hassle-free solution for those locked out of their Itel devices due to FRP lock. With its user-friendly interface and advanced features, Dr.Fone makes FRP bypassing a straightforward process, even for users with limited technical knowledge.
Dr.Fone - Screen Unlock (Android)
Remove Google Lock (FRP) from Itel Devices
- Pattern, PIN, password, fingerprints & face screen lock can all be unlocked.
- Bypass Android FRP lock without a PIN or Google account.

- Unlock mainstream Android brands like Samsung, Itel, Xiaomi, etc.
- No tech knowledge required, Simple, click-through, process.
3,981,454 people have downloaded it
3 Steps to Bypass Itel FRP Lock with Dr.Fone - Screen Unlock (Android)
- Step 1. After installing Dr.Fone - Screen Unlock (Android), launch the program and select the “Screen Unlock” option from the main menu. Continue to Android > Remove Google FRP Lock.

- Step 2. Then select Itel and click the Start button to continue. Then, connect your locked Itel device to the computer using a USB cable. Ensure that USB debugging is enabled on your Itel device before proceeding with the next steps.
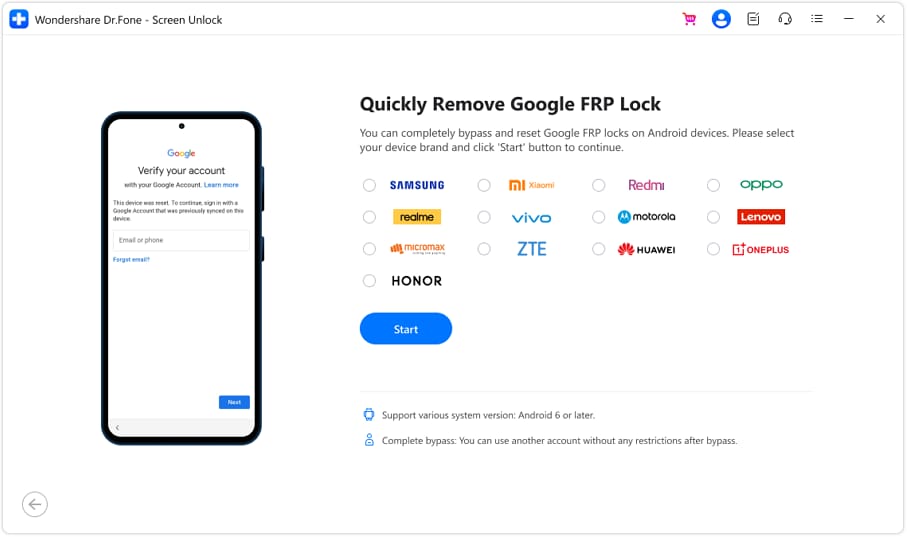
- Step 3. Once your Itel device is successfully connected, Dr.Fone - Screen Unlock (Android) will automatically detect it. Follow the on-screen instructions to put your Itel device into specic mode. Once in the correct mode, Dr.Fone will start downloading the necessary firmware to bypass the FRP lock.
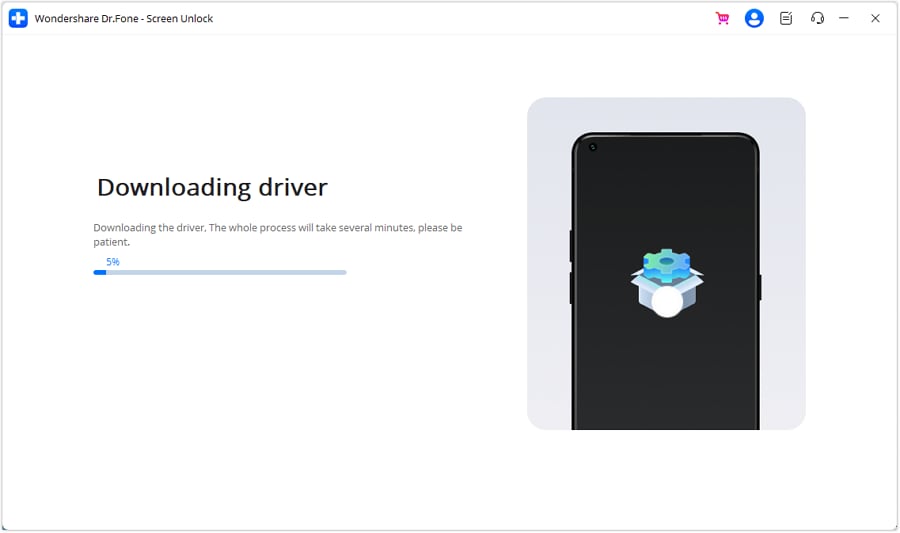
During the process, it’s crucial to keep your device connected to the computer and refrain from disconnecting it until the bypass is complete. After the firmware download is finished, Dr.Fone will initiate the FRP lock bypass process. Once completed, your Itel device will restart, and you’ll regain access to it without encountering the FRP lock.

The Bottom Line
FRP is a great feature to add security to Android phones. However, sometimes it is necessary to bypass it to fully use your phone. When you are stuck with an FRP lock, it is a frustrating situation, especially when you want to factory reset your phone. We have described various methods so that you choose the best solution according to your requirements for the Itel P40+ FRP bypass. Among them, bypassing Itel FRP lock is made simple and efficient with Dr.Fone - Screen Unlock (Android). Say goodbye to FRP lock frustrations and regain access to your Itel device swiftly with Dr.Fone - Screen Unlock (Android) .

Easy Guide to Itel P40+ FRP Bypass With Best Methods
The Google Factory Reset Protection (FRP) lock is a security measure in Android smartphones. By default, FRP Lock is active on all Android devices after the Android 5.1 release and triggers upon the execution of a hard reset. Despite its undeniable importance as a security feature, there are two specific instances when dealing with FRP lock can be difficult.
The first one is forgetting your Google ID details. The other situation is buying a second-hand device locked with the previous owner’s Google ID. This article deals with Itel P40+ FRP bypass Android 11. It provides three methods to bypass FRP, allowing you to access your Itel P40+ again.

Part 1: [Direct Solution] Itel P40+ FRP Bypass Android 11 With Wondershare Dr.Fone
For the first and foremost remedy of Itel P40+ LTE FRP bypass, you can use effective software. While other methods are not as versatile and simple, you can take a few steps to unlock your device. The best software solution to bypass FRP on Itel devices currently available is Wondershare Dr.Fone. It is a comprehensive solution that offers functions ranging from bypassing screen locks to FRP locks.
Dr.Fone – Screen Unlock (Android) goes beyond Itel, extending its capability to bypass FRP locks on devices from diverse brands like MI, Samsung, OPPO, and more. Additionally, it streamlines the unlocking process for various screen locks, covering passwords, PINs, fingerprints, and facial recognition. Dr.Fone is designed with a user-centric approach, ensuring accessibility for users of all types to unlock their devices effectively.
Key Features of Wondershare Dr.Fone
- If your locked device is Samsung or LG brand, you can remove the screen lock without any data loss.
- Wondershare Dr.Fone supports over 2000 Android devices for over 18 Android brands, making it a diversely compatible tool.
- With the help of this Itel P40+ FRP unlock tool, you can recover your data from a broken Samsung Device.
Steps for Itel P40+ FRP Bypass Android 11 With Wondershare Dr.Fone
By eliminating the FRP lock, Dr.Fone facilitates the option of having complete access to your device. Below are the steps required to Itel P40+ FRP bypass using Dr.Fone – Screen Unlock (Android):
- Step 1. Access Remove Google FRP Lock in Dr.Fone
You can begin with installing and launching Wondershare Dr.Fone. Go to the “Toolbox” tab and press “Screen Unlock.” On the following screen, choose “Android” as the Itel P40+ device type and click “Remove Google FRP Lock.” Now, you will be asked to choose the Itel P40+ device brand, after which you need to continue by clicking “Start.”

- Step 2. Successfully Bypass Itel P40+ FRP Lock
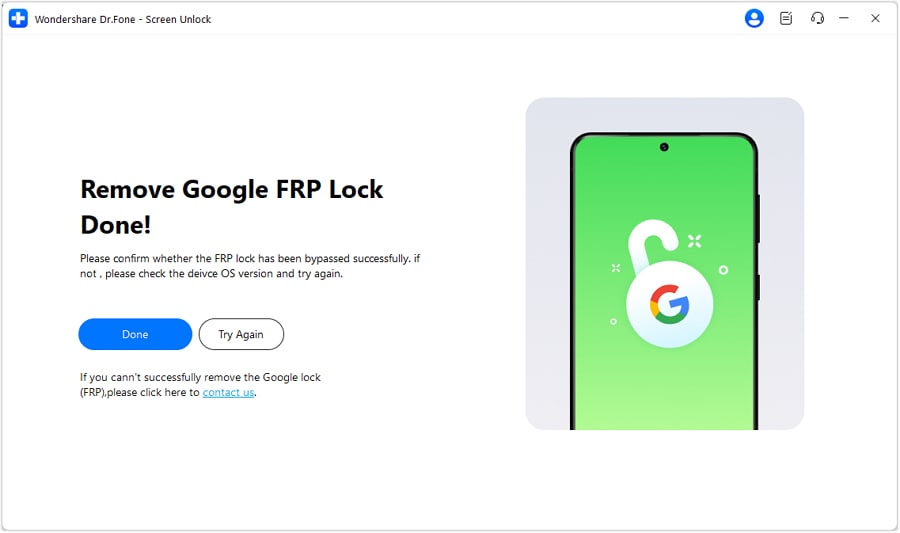
It will lead to the downloading of the required driver for your Android. Upon downloading, turn off your device and establish a connection with the computer. While connecting, press and hold both “Volume” buttons for 3 seconds. This action will commence the FRP bypassing process, requiring a brief moment for completion.
Part 2: Itel P40+ FRP Bypass Without PC Using SIM Card Method
While the software solution is the best option for Itel P40+ Pro FRP bypass, other options can also feature an unlocking service. These conventional methods are complex; however, they offer a solution to unlocking FRP.
The SIM card method is a favored FRP lock bypass approach among Itel P40+ users. Here is a comprehensive guide on employing this method to bypass the FRP lock on Itel P40+:
- Step 1. To start, turn on your Itel P40+ and confirm it is FRP-locked by going up to the screen where it demands Google ID. Afterward, return to the language screen and enter a PIN-locked SIM card into the Itel P40+ device.

- Step 2. Before inserting the SIM card, ensure at least one contact is saved on the card. It could be any random number, and you can do it by inserting the SIM card into another device. After inserting the SIM card, tap “Emergency,” where the Itel P40+ device asks you for the PIN of the SIM card.

- Step 3. After pressing “Emergency,” tap “Emergency Information” on the next screen. On the “Owner” screen, tap the icon at the top right corner, enter the SIM PIN code, and when asked, choose “Add contact.”

- Step 4. Add the contact you saved as the owner’s contact and make a call. During the call, tap “Contacts” to access your saved contacts, and select the one you saved. On tapping the three dots on the top, select “Share” and choose “Share as text.”

- Step 5. Choose “XShare Mini” as the sharing option, grant the necessary permissions, and leave the Itel P40+ device on the “QR Code.” Move to another device and access a web browser. Go to mobileteamofficials.com and download two apps: “Google Account Manager” and “Account Login/ FRP Bypass.”

- Step 6. On the other device you’re using, download the two apps from the Google Play Store: “Activity Launcher” and “XShare.” Now open the XShare app and grant all the required permissions. Tap “Receive” and scan the QR code from the Itel device to complete the contact transfer process.

- Step 7. Now, select three apps: “Google Account Manager,” “Account Login/ FRP Bypass,” and “Activity Launcher” within XShare on the second device. On the Itel device, tap “Receive” and scan the QR code to complete the process.

- Step 8. Once received, install all three apps on the Itel device. Now, first open “Account Login/ FRP Bypass” and tap “three dots” from the top right corner to select “Browser Sign In.” When it takes you to the Google sign-in page, log in using any Google ID.

- Step 9. After signing in, return to the apps and open the Activity Launcher app. Within the app, tap “Android Setup” on the following screen and scroll down to press the “Android Setup” entry. This will perform the Itel P40+ Lite FRP bypass successfully.

Here is a video for you to learn how to bypass FRP:
Part 3: Itel P40+ FRP Bypass With APK
While you consider other FRP bypassing methods instead of Wondershare Dr.Fone, there is another option that you can go with. If you prefer a method that doesn’t involve a PC or SIM card, Itel P40+ Pro FRP bypass using an APK is a viable option. You can follow the steps given below to complete this Itel P40+ Lite FRP unlock tool process:
- Step 1. To begin, turn on your Itel Android 11 Phone. Press “START” and link your phone to a Wi-Fi connection. Return to the Welcome Screen, then press “Start” and choose the option to “Add a New Network.”

- Step 2. Touch the “Microphone” icon and choose “Deny” across the pop-up. Go for the “Microphone” icon again, and opt for “Deny.” Lastly, touch the same icon again and opt for “Allow.” This will take you to the Gboard App information screen.

- Step 3. Choose “Permissions” and tap the “Search” icon at the top-right corner of the follow-up screen. Search for “Settings” and pick the respective app from the results list. Tap “Open” to access the Settings application. This action will direct you to the “Settings” interface.

- Step 4. Navigate to “App management” and select “App settings.” Access the XShare APK, launch it, and ensure you have a secondary Android device available. Open the Play Store on the second device, and download and install the XShare App for further processing.

- Step 5. Next, open the Chrome Browser on the second device. Enter one of the following URLs in the browser and download “FRP Bypass APK” and “Google Account Manager 9.0 APK”:
https://tiny.cc/frptools or https://bit.ly/2NkxXYs

- Step 6. Open the XShare APK on your second Android device. Navigate to the downloaded apps and tap “Send.” Return to the FRP phone and select “Receive” on it. Scan the QR code to establish a connection between the Itel P40+ devices. Verify on your FRP phone that both FRP APK files have been received and proceed with the installation.

- Step 7. Close and exit the XShare APK on the FRP phone to return to the “App settings” screen. Launch the FRP Bypass APK, tap the “three dots” upon opening, and choose “Browser Sign-In.” Sign in with your Google Account ID and password.

- Step 8. Return to the “App settings” Screen and uninstall the Google Account Manager APK. Proceed to the initial “Welcome” screen by tapping the back key repeatedly. Initiate the Itel P40+ device setup procedure by tapping “Start.” You should now observe “Account Added,” indicating successful FRP bypass on your Itel P40+ FRP bypass Android 11.

Conclusion
In conclusion, the Itel P40+ LTE FRP unlock tool demands varied approaches catering to user preferences. While methods like SIM cards and APK offer alternatives, Wondershare Dr.Fone - Screen Unlock (Android) is the optimal solution. Dr.Fone simplifies the Itel P40+ LTE FRP process with its user-friendly interface and security assurance.
Tips: Are you searching for a powerful FRP bypass tool? No worries as Dr.Fone is here to help you. Download it and start a seamless unlock experience!
The Complete Guide to Itel P40+ FRP Bypass: Everything You Need to Know
If you are looking for Itel FRP bypass tools then it means that either you have forgotten your Google ID and password details or have purchased a refurbished device having FRP lock. So, now when you have already landed in a situation the only thing you can now do is find the solution and for this core purpose, we are here to help you. To bypass the Google account Itel, you would a tool or a program specially designed for the task.
There are many ways in which you can bypass the FRP lock. Some of these techniques may require a PC, while others won’t. Similarly, some may help you bypass the FRP lock without paying anything, while others may charge a certain sum for the process.
With so many variations, settling down with only one option is challenging. For this reason, we have curated a complete guide on this to avoid further complications.
Part 1: What is FRP lock on Itel?
Almost all smartphones come with multiple built-in security and protection features to ensure no 3rd party operator or tool can access the data stored in the system memory or the Itel P40+ device. However, if someone initiates the factory reset in your Itel smartphone, the person will easily access everything in the Itel P40+ device and the system.
This is where the FRP or factory reset protection program comes in. It is a built-in safety feature in smartphones that lock the Itel P40+ device as soon as a factory reset is initiated or the user does not enter valid credentials for the Google account. Once the lock is activated, deactivation is very difficult, and it requires the credentials to access the system once again.
As a result, the user cannot restore the Itel P40+ device to its default mode through a factory reset and wipe every data from both system and device memory. The FRP program has proven beneficial for optimal data protection from piracy and unauthorized access. This way, even if you lose your phone or it gets stolen, no one will be able to initiate the reset program to wipe everything from the Itel P40+ device.
The FRP program is not available on all smartphones from Itel. Suppose you want to check whether it is compatible with your smartphone model, open settings from your phone, and go to the Itel P40+ device information section. There, you will be able to see the factory reset option.
Part 2: 8 Ways to bypass Google locks on Itel phone
Although the factory reset protection program and the lock are beneficial to keep your device safe from other people’s hands, sometimes it can cause problems for you also. For example, if you forget the Google account credentials, you won’t be allowed to access a device due to the activation of the FRP lock.
That’s why it’s better to use the bypassing concept of FRP lock in your Itel phone. The following section will introduce you to the best and result-oriented methods for bypassing the Google lock and paving the way for unrestricted access to the Itel P40+ device and system.
| Process | Free or paid | Limitations | With or without a PC |
|---|---|---|---|
| Reset all your settings in Safe Mode | Free | Needs safe mode | Without PC |
| Emergency Call | Free | For Android 5 or less | Without PC |
| QuickShortcutMaker APK | Free | Need Google credentials | Without PC |
| TalkBack | Free | Not compatible with the recent android version | Without PC |
| Itel FRP Tool | Free | Need fast boot mode | With PC |
| Itel FRP Eraser | Paid | Have to purchase the key | With PC |
| Itel FRP & ID Bypass Tool | Free | Dependency on PC | With PC |
2.1 How to Bypass Google Account on Itel without PC?
If you are looking for a solution to bypass Google Account on your Itel device without a PC, there are 4 ways that will work as decent solutions. These methods all have their limitations, you can choose the one that is most suitable for you.
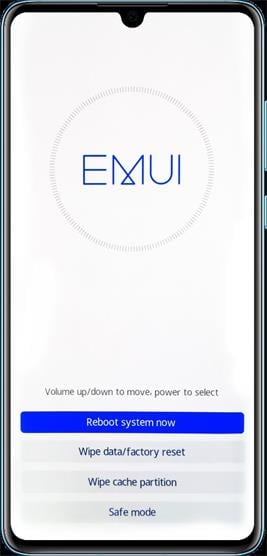
1. Reset all your settings in Safe Mode
One of the easiest and most basic ways of bypassing the FRP lock is by enabling the safe mode on your mobile and proceeding with a factory reset of all the settings. This will erase the data, especially the current Google account, which is incorporated within the phone. Once everything is related, the settings will be restored to their original form or the default value. This will allow you to have unhindered access to the Itel P40+ device, as the FRP lock will get disabled due to settings reset.
Pros
- It is the easiest way to bypass the FRP lock.
- It does not take much time for the lock to get disabled
- Sounds like a fantastic process for unlocking your mobile on the go
Cons
- Remove all other changes you have done to the Itel P40+ device settings
Limitations
This method is possible only if you can access the safe mode of the mobile or you don’t have any significant change saved in the Itel P40+ device settings.
Tips: Are you struggling to unlock your Itel device? Dr.Fone - Screen Unlock (Android) is the solution you need. With the ability to remove pattern, PIN, password, and fingerprint locks, it’s user-friendly for everyone. Easily bypass your Itel lock screen, whether you’ve forgotten your password or have a locked second-hand Itel device. Plus, it works even when your screen is broken. Get access now!
2. Emergency Call
Another standard method of bypassing the factory reset program on the mobile is through an emergency dialer. It is very easy to use, and you don’t require any technical knowledge. However, there are certain limitations that you should be aware of before you use the emergency dialer to bypass the FRP lock and gain access to the Itel P40+ device.
Steps for FRP unlock Itel using the emergency dialer
- Step 1: Click on the emergency dialer option from your home screen to show that the number pad comes into view. Once you have access to the numbers, dial * or any other numeral multiple times.

- Step 2: Repeat the process multiple times till you fail to watch the series anymore on the emergency dialer.

- Step 3: Return to your mobile lock screen and click on the camera icon. As soon as the camera opens, pull down the notification tab from above and click on the gear symbol. This will give you access to the Itel P40+ device settings.
- Step 4: There will be a password prompt screen where you must paste the number string you copied from the emergency dialer. Repeat the process multiple times until the interface crashes followed by unlocking the lock screen.

- Step 5: Once done, wait for a couple of seconds before the camera crashes and gives you unhindered access to the Itel P40+ device. As soon as the camera crashes, the home page will appear on your device, and you can use it.
Pros
- It is the easiest process for unlocking the phone
- You don’t have to reset the settings
- No technical knowledge is involved in this process
Cons
- Lengthy and time-consuming
Limitations
It is applicable only for smartphones with Android version 5 or less.
3. QuickShortcutMaker APK
Another method of bypassing your device’s FRP lock is using the QuickShortcutMaker APK . This app is available in the Google Play store, where you can download it to bypass the factory reset protection program and access your device within minutes.
Step-by-step use
- **Step 1:**Switch on your FRP device and connect it to the WiFi network. This way you can have access to the Internet.

- Step 2: Open the quick shortcut maker apk and search for Google account manager.

- Step 3: A long list will be displayed from where you must select Google account manager to access the expanded menu.
- Step 4: From the options, select the one showing the type of email and password.

- Step 5: Once done, a new window will open where you need to click on Try.

- Step 6: When the white page appears for re-typing the password, click on the 3 dots present at the top right corner.
- Step 7: Select the browser sign-in option and enter your Google ID with the password. Finish the entire process and then restart your Android device.

- Step 8: Once you restart the Itel P40+ device and the Google account is added, the FRP lock will automatically get bypassed.

Pros
- It is pretty easy to bypass the FRP lock
- Fast and result effective process
- You need to have the application
Cons
- Internet connection is required
Limitations
You can use this method only if you remember your Google ID and password. This method is not for you if you don’t have the credentials over cannot remember the actual password.
4. TalkBack
Talkback is another beautiful application through which you can unlock the FRP protection system on your mobile. It is powered by Google and comes embedded with the operating system. As a result, you don’t have to download any 3rd party tool to bypass the factory reset protection program.
Step -by-step use
- Step 1: Connect an Android device to the WiFi network and return to the welcome screen. Click the home button price to activate the Talkback feature of the operating system.
- Step 2: Draw an L on the main screen and then swipe to the right. Several options will appear out of which you need to double tap on the Talkback option.
- Step 3: There will be an option to say speak when the screen is off. Please enable it and then draw another l on the screen. Click on pause feedback and then on OK to suspend the entire Talkback process.
- Step 4: Click the help and feedback option and type in the search icon for voice search. Once the voice option appears, please select it and click on get started with Voice Access.

- Step 5: Play the video tutorial and then click the share button. There will be 3 dots underneath, which you need to tap. Once you do so, you will be directed to the official website over the application of YouTube.
- Step 6: Pause the video and click on the 3 dots at the screen’s top right corner. Click on the terms and privacy policy option.
- Step 7: Choose a feasible browser from the decided list to bypass the FRP lock successfully.
Pros
- Does not need any Google account credential
- Allows you to access the previous account saved on the Itel P40+ device
- No need to download any 3rd party tool
Cons
- Time-consuming process
Limitations
It is a bit difficult, and you won’t be able to access it in any recent Android version. Also, the mobile needs to be connected to the WiFi network for the Talkback feature to work seamlessly.
2.2. How to Bypass Google Account on Itel with PC ?
1. Itel FRP Tool
One of the best tools that you can use to bypass the Factory Reset Protection lock is the Itel FRP Tool. It is easy to use and doesn’t involve too many complicated steps. Plus, it is compatible with most Itel models, giving you the leverage to access your device without removing or deleting any further data.
Step-by-step use
- **Step 1:**The first step is to put your device in fast boot mode. To do so, face down the volume down button for a couple of seconds, automatically initiating the fast boot mode.
- **Step 2:**Now, you have to extract the zip file of the Itel FRP Tool and then open the tool.

- Step 3: It needs to display a comment-like device connected. If you see the comment, click on it as FRP, and the block will get disabled in the fast boot mode.
Pros
- Amazing process for the beginners
- Reboot is done in a couple of steps only
- No data will be lost
Cons
- You have to put your device in the fast boot mode
Limitations
You cannot use this tool until you put the Itel P40+ device on the fast boot mode.
2. Itel FRP Eraser
This is probably the most accessible tool to remove the FRP lock from your Itel smartphone.
Step-by-step use
- Step 1: You must download the tool and install Itel Phone Drivers on your PC.
- Step 2: Now, open the app and put the smartphone in Fastboot Mode.
- Step 3: Enter the license key in the FRP PWD box and click on FRP Unlock.

- **Step 4:**It will take a couple of minutes for the unlocking process to get over.
Pros
- Easy to use
- Unlocks the Itel P40+ device within seconds
Cons
- Need to purchase the key
Limitations
You need to get the key after purchasing it.
3. Itel FRP & ID Bypass Tool
This is a free application from Itel. You can easily bypass the FRP lock and access your device. However, you will require your PC to download the lock tool, especially the latest version.
Step-by-step use
- **Step 1:**Open your PC and extract the Itel FRP and ID lock tool. Now run ItelFRP&IDBypassTool.xe as the admin.
- Step 2: Once the program launches, connect your phone to the PC through a USB cable. Then, open the tool.

- Step 3: As the tool opens, click on read info and enable the ADB option. It usually takes around 22 seconds maximum to allow the ADB to function on your smartphone, automatically rebooting the entire device.

- Step 4: A pop-up option will show where you need to click on allow USB debugging.
- Step 5: Click on the check device from the bypass tool on your PC.

- Step 6:Then, select the Bypass FRP and ID option. Once done, you can access your phone because the FRP lock will get bypassed.

Pros
- Does not require any money
- The fastest and most straightforward process of bypassing
- No involvement of Google account or its credentials
Cons
- You need to download the file and install it on your PC
Limitations
The major limitation of this process is its dependency on a computer or laptop. Next, you won’t be able to reboot your device until and unless you connect it to the PC through the USB cable. Some data can get lost due to the automatic reboot system.
Tips:
One of the best ways to bypass FRP lock is to disable it beforehand. To do so, go to your settings and click the accounts option. All the accounts like WhatsApp, Facebook, Instagram, and Google will open up. Click on Google and remove all the saved and active Google accounts. This will automatically disable the FRP lock.

Bonus Tip: How to Unlock Itel Screen Lock without Google Account?
The above-listed methods in part 2 as well as part 3 are not only lengthy but also quite complicated. Moreover, the different way has different limitation and the process of bypassing the lock is complicated and lengthy.

So, for the users who are having issues with Android screen lock, but looking for a simpler yet functional tool, we recommend Dr. Fone-Screen Unlock as the best option. This Windows and Mac-based software is trusted by people across the globe as it helps remove all types of screen locks PIN, password, pattern, as well as a fingerprint in a hassle-free quick manner.

Dr.Fone - Screen Unlock (Android)
Get into Locked Itel Phones within Minutes
- 4 screen lock types are available: pattern, PIN, password & fingerprints.
- It’s the only solution available that works with both Windows and Mac to help you regain access to your device easily.
- Everybody can handle it without any technical background.
- Provide specific removal solutions to promise good success rate.
4,008,669 people have downloaded it
The program can be used without worrying about any malware or virus. Steps for removing screen lock using Dr. Fone-Screen Unlock (Android)
- Step 1. Launch the software on your system and choose Screen Unlock from the main interface.
- Step 2. Next, connect your phone to your system using a USB cable and then select Unlock Android Screen option.

- Step 3. Select Itel from the list of the supported devices.

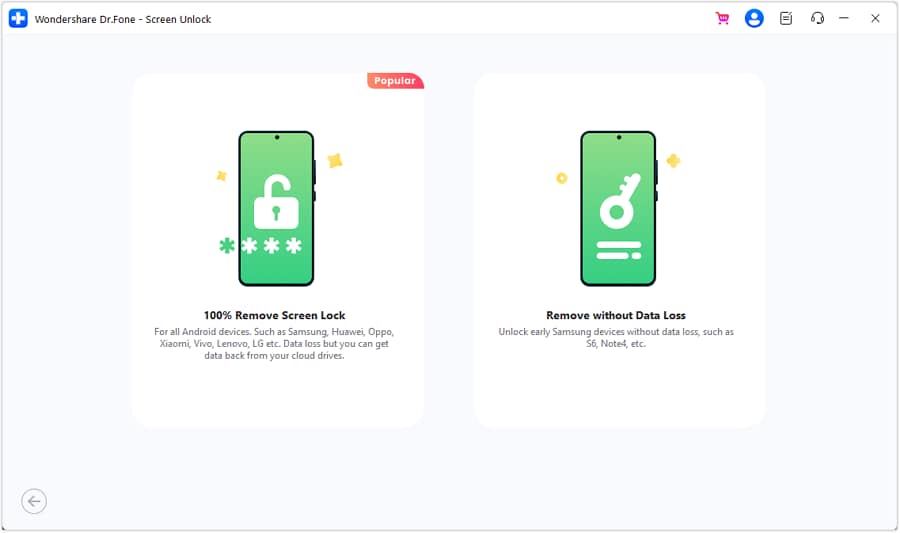
- Step 4. Choose “100% Remove Screen lock” after taping Itel icon. Dr.Fone will start to unlock your Itel phone screen after getting into the specific mode. And then wait for the unlock process to complete.
Conclusion
In this section, we have described the multiple processes for bypassing FRP locks on Itel. You can try out the app solutions available for this task on your phone, and follow each step cautiously. For overall benefits, try the Dr.Fone - Screen Unlock (Android) option.
Overall, choose the best option according to your convenience and start working on the unlocking process.
Also read:
- [Updated] Curriculum Capturer's Selection Defining the Most Effective Recorders
- 2024 Approved Simplify Your Schedule Using FREE Clocks Wisely
- 5 Quick Methods to Bypass Vivo V30 Lite 5G FRP
- A Step-by-Step Guide on Using ADB and Fastboot to Remove FRP Lock on your Vivo Y36
- About Itel FRP Bypass
- About Xiaomi Redmi Note 12R FRP Bypass
- Backup Blueprint From Your Phone to Your Snap Story
- Come Risolvere I Problemi Con L'UEFI Boot Manager Di Windows Server Tutte Le Migliori Strategie Qui!
- Free Intel 825N VGA Graphics Card Drivers: Quick Setup for Optimal Performance
- Free SM Bus Controller Software: Compatible with Windows 11/10/8/7 – Full Downloads Available
- How to Bypass Google FRP Lock on Xiaomi Redmi A2+ Devices
- In 2024, AddROM Bypass An Android Tool to Unlock FRP Lock Screen For your Tecno Spark 10C
- In 2024, Essential Tips for Capturing High-Quality Audio in Filmmaking
- In 2024, Full Guide to Bypass Vivo X100 Pro FRP
- In 2024, How to Transfer Contacts from Nubia Red Magic 8S Pro to Other Android Devices Using Bluetooth? | Dr.fone
- In 2024, Is GSM Flasher ADB Legit? Full Review To Bypass Your Honor Magic 6 Pro Phone FRP Lock
- In 2024, Step-by-Step Tutorial How To Bypass Nubia Red Magic 9 Pro FRP
- In 2024, Top 10 OnePlus Ace 3 Android SIM Unlock APK
- Scrutinizing Expenses on Top-Tier AI Service Provisioning
- Title: In 2024, 5 Quick Methods to Bypass Itel P40+ FRP
- Author: Lynn
- Created at : 2024-12-19 23:34:51
- Updated at : 2024-12-21 04:46:02
- Link: https://bypass-frp.techidaily.com/in-2024-5-quick-methods-to-bypass-itel-p40plus-frp-by-drfone-android/
- License: This work is licensed under CC BY-NC-SA 4.0.
