
A Step-by-Step Guide on Using ADB and Fastboot to Remove FRP Lock from your Google
A Step-by-Step Guide on Using ADB and Fastboot to Remove FRP Lock on your Google Pixel 8 Pro
Factory Reset Protection is one of the security measures available on Android 5.1 and later devices to prevent intruders’ unauthorized factory resetting of the Google Pixel 8 Pro device. Among the several ways to fix this issue and remove the lock, one is ADB and Fastboot commands. So, if you are aware of using Android Debug Bridge, the below content will help you understand how it can be used to remove the FRP lock.
You can watch the video below to bypass FRP lock without hassle!
Part 1: Quick Overview of ADB and Fastboot Commands
1. What are ADB and Fastboot?
Standing for Android Debug Bridge, ADB and Fastboots are the methods through which communication with an Android device can be done through a computer. Under this method, the commands and the actions that are sent from the system are performed on your Android device.
Several issues can be resolved, and multiple functions can be performed using the ADB format tool and Fastboots, and this also includes removing the FRP lock on your Android device. To use this method, USB debugging should be enabled on the Google Pixel 8 Pro device.
For specific brands of Android phones, specific utility tools are available like the Vivo ADB format tool and the Samsung ADB format tool, which are used explicitly for Vivo and Samsung phones, respectively.
2. How Do ADB and Fastboot Bypass FRP?
Using the versatile ADB command-line tool and Fastboots, the Google FRP lock can be removed using several commands depending on the OS version. This is a client-server program that includes a client who sends the commands, a daemon used to run the commands on the Google Pixel 8 Pro device, and a server that facilitates communication between the client and the daemon.
ADB comes included in the Android SDK Platform-Tools package, and this can be downloaded using the SDK manager.
3. What Are the Android Versions that ADB and Fastboot Command Support?
The Android versions on which ADB and Fastboot commands can be used are as follows:
_Android 5 – Lollipop__Android 6- Marshmellow__Android 7 – Nougat__Android 8- Oreo__Android 9- Pie__Android 10 – Q (expected to work though not tested as yet)_

Part 2: How to Set Up ADB and Fastboot Commands to Remove FRP Lock on Android?
To remove FRP lock using ADB, you first need to install and set up ADB and then remove them using the command. The steps for the same are enlisted below.
Steps to remove FRP using ADB

Step 1. Firstly, download the ADB installed setup file and then extract the files from the toolkit on your system in a folder.
Step 2. Next, you need to run adb.setup.exe and then type Y for installing the drivers for ADB and Fastboot.
Step 3. Again, enter Y for installing the drivers and when done successfully, the command window will close.
Step 4. Next, power on your Android device and connect it to your PC using a USB cable. Here also ensure that USB debugging mode is enabled on your Android device.
Step 5. Next, hold down the Shift key and then right-click at any place blank in the ADB folder, and then choose the Open command window here option.
Step 6. Now to remove the FRP you need to enter the following commands at the command prompt one by one where enter needs to be clicked after every line.
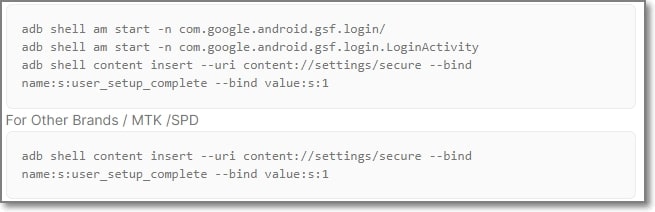
_Adb shell am start -n com.google.android.gsf.login/__adb shell am start -n com.google.android.gsf.login.LoginActivity__adb shell content insert –uri content://settings/secure –bind name:s:user_setup_complete –bind value:s:1_Step 7. The above commands are for Samsung devices. If you want to remove the FRP on other brands, enter the following commands:
_Adb shell content insert –uri content://settings/secure –bind__name:s:user_setup_complete –bind value:s:1_
After the execution of the commands, the FRP lock will be removed from your Android device.
Steps to remove FRP using Fastboot
Step 1. Put the Android device into the bootloader or fastboot mode. (depending on the model and brand of your Android device, the process of entering into the fastboot will differ).
Step 2. Connect your phone to your PC using a USB cable.
Step 3. Next, depending on the system, enter the following command in the CMD window:
_Lenovo FRP command__fastboot erase config__fastboot reboot__XIAOMI FRP command__fastboot -w__MICROMAX YU YUPHORIA FRP__Fastboot -i 0x2a96 erase configFastboot -i 0x2a96 reboot__DEEP/HTC/Other Brands FRP__fastboot erase configfastboot reboot_
Part 3: Limitations of Using ADB and Fastboot Command Method
The ADB and Fastboots command is a workable solution for removing the FRP lock on your Android device, the drawback is that the method is quite complicated and requires thorough technical know-how of ADB and its working. There are several limitations associated with this method as enlisted below.
- Requires technical know-how
To remove FRP using the ADB command you need to have a thorough knowledge of using the tool. The tool has a deep learning curve which makes this method little for the majority of the users.
- Might not unlock the phone
You can try the ADB method for removing the FRP lock but there is no guarantee that the results will be positive and your device will be unlocked.
- Issues with the drivers
Several times while using this method, you might encounter driver issues when your device is not detected as proper drivers are not installed.
- Unexpected issues and errors
ADB is a command-based method, and thus it is important that the commands are entered right. If there is a slight error in the typing of the command, it might lead to major issues and can even be the Google Pixel 8 Pro device damaged.
- The process is not user-friendly
ADB is a technical process aimed toward the geeks, and thus the overall process is not user-friendly and complicated.
Part 4: The Best ADB Alternative to Bypass FRP Lock on Android Phones
Considering the several limitations of the ADB and Fastboot command method, the need for a simple, user-friendly, and workable solution for removing FRP lock on Android devices arises. One of the best software here that we recommend is Dr.Fone - Screen Unlock (Android) which helps in removing and bypassing many Android phone screen locks including the one appearing due to FRP lock.
Dr.Fone - Screen Unlock (Android)
Remove Google FRP on Samsung without PIN code or Google accounts.
- Pattern, PIN, password, fingerprints & face screen lock can all be unlocked.
- Bypass Google FRP on Samsung without pin code or Google accounts.
- No tech knowledge asked, everybody can handle it.
- Work for Samsung, Xiaomi, Redmi, OPPO, etc.
4,005,551 people have downloaded it
The process of using the software is user-friendly and thus can also be used by non-techy users.
Steps for removing FRP lock on Android using Dr.Fone Screen Unlock
- Step 1. Launch the installed software and choose the Screen Unlock option from the main interface. Choose Android and then select the Remove Google FRP Lock option.

- Step 2. Select the model brans from the options shown on the interface, and then connect your phone to your PC using a USB cable. The connected device details will appear on the interface.

- Step 3. Follow the next steps as they appear. Once the FRP lock is successfully removed, the prompt window will show its completion. Click Done if you have successfully executed the process.
The above is the brief steps for the process. You can check the bypass Samsung FRP lock guide in detail.
Conclusion
If you are well versed with the commands of ADB and Fastboots you can go ahead and use the ADB bypass FRP tool for removing the FRP lock but if this command line method seems complicated for you, Dr.Fone Screen Unlock is the best tool to use.
Full Guide to Bypass Google Pixel 8 Pro FRP
I updated my Google Pixel 8 Pro to the latest Android, and now it’s stuck on FRP lock. I don’t know how to Bypass the Pixel FRP lock, which is annoying because I have to finish an assignment. How should I do it?
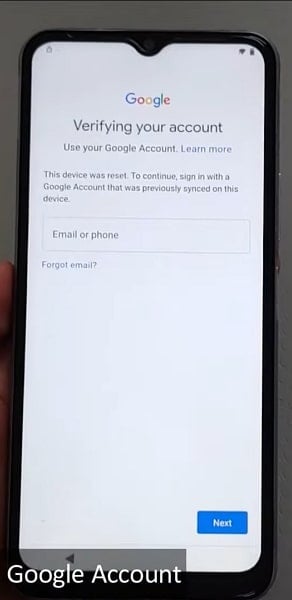
The FRP lock is one of Google’s security methods for Android devices. It keeps unapproved people from erasing your phone data. However, an update or unidentified issue may sometimes lock your phone without warning. Just like the case above, it can be an unpleasant experience. Therefore, this Google Pixel 8 Pro FRP bypass article will show you some ways to bypass it.
The Google FRP lock is not a new issue and can occur to almost any Android user. If you neglect to disable the Factory Reset Protection before a reset, Google will lock your phone. Therefore, you will have to bypass the Google account to resolve it.
Part 1: 3 Ways to Bypass Google Pixel 8 Pro FRP
1. Download FRP Bypass APK (OTG Cable Needed)
The use of OTG for bypassing the Google FRP lock on Google Pixel 8 Pro after a hard reset is a great technique to bypass the Google account lock.
Before we get to the guide, you need an Android OTG cable, fast Wi-Fi, and a PC.
![]()
If you do, follow these steps to start bypassing your Google account:
Step 1. Download the FRP bypass APK on your PC.
Step 2. Move (by copying) the APK document to your flash drive.
Step 3. Utilize the OTG cable to connect your Pixel phone and flash drive.
Step 4. Install the APK document on your Pixel device when the file manager application springs up.
Step 5. The phone Settings will presently be accessible for you to open.
Step 6. Look for and select the “Backup and Reset” choice.
Step 7. Select the “Factory Data Reset and then Reset everything from the phone. That will delete all the phone’s media files, settings, apps, and accounts.
Step 8. Your Pixel phone will reboot, and you won’t see the FRP lock.
![]()
2. Use Pin Lock Sim to Access Chrome
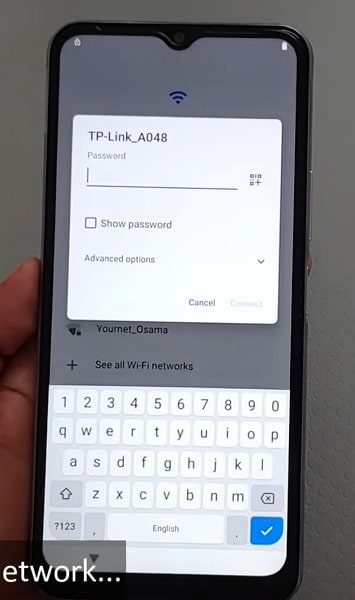
Step 1: Start the cycle by eliminating the SIM card from your Pixel device. Presently connect it to Wi-Fi.
Step 2: Insert the SIM card once more. Mistype your PIN code multiple times.
Step 3: You will be approached to give your PUK code straightaway. Continue to type wrong PUK numbers until the SIM card becomes unusable.
Step 4: Tap the padlock symbol on the lock screen to open another menu choice. You will see the warning setting choice at the top corner of the screen.
Step 5: Select the See All options. Search for the YouTube App and afterward go to Settings and open History and Privacy to access the Youtube ToS.
![]()
Step 6: This will open the Chrome Browser, where you select Accept and Continue. Then, at that point, pick Next > No Thanks.
Step 7: Find a dependable FRP bypass tool to unlock FRP on the program. Go to Security from Setting and open Pin Windows. Then use the Screen lock type to Unpin the SIM.
Step 8: Restart your device after setting up a PIN code. You can utilize your Pixel without marking into your underlying Google account.
Bonus Tip. Use Dr.Fone-Screen Unlock (For Other Android phones)
We have presented numerous FRP methods in this guide. Nonetheless, they might fail to tackle the issue some of the time. There is no question that a bypass tool will be a lot more straightforward and speedier. Therefore, we strongly recommend you use the Wondershare Dr.Fone Bypass FRP tool for a less complex and quicker strategy. Dr.Fone - Screen Unlock (Android) is a speedy, easy-to-use FRP bypass for you to get rid of the Google issue. It lets you access your home screen once more. Here are the needed steps for bypassing the Google FRP lock:
Step 1: Open the software, connect your phone and PC and pick Screen Unlock. Then click on Screen Unlock > Android > Remove Google FRP Lock.
Step 2: Pick your device’s brand and click Start.
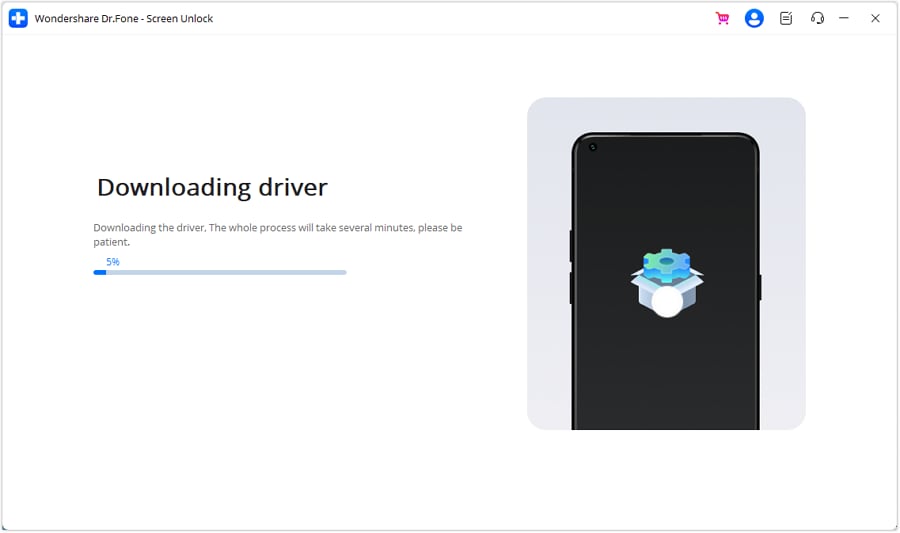
Step 3: Once you choose the Google Pixel 8 Pro device brand, Dr.Fone will commence the download of the necessary driver.
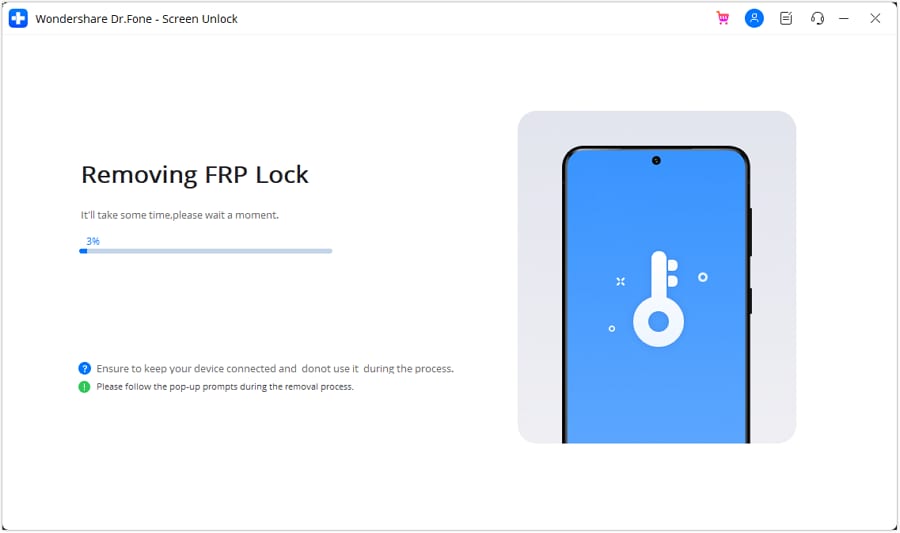
Step 4: After the download is complete, the procedure to eliminate the FRP lock will initiate, requiring a few minutes. Once the lock is successfully removed, tap Done to finalize the process.
 safe & secure
Part 2: Definition of Google Pixel 8 Pro FRP
Factory Reset Protection (FRP) includes security on Android gadgets with OS Version 5.1 and higher. The FRP gives an underlying security highlight you can utilize that safeguards your gadget and data, including screen locks and data encryptions. The FRP automatically works once a Google account has been logged in on the phone. However, it will stop working when the Google account is removed from the Pixel phone preceding the Factory Data Reset. When the FRP has been enacted, it will not let others use your phone after a Factory Reset in an untrusted environment. It implies that the FRP Lock will come into play if your Pixel gets Factory Reset in an unrecognized way.
![]()
Part 3: Can factory reset really remove FRP?
To remove FRP, you must remove all Google accounts from your Pixel phone. After doing so, you can factory reset it to clear all your data. So technically, you need to remove all the accounts, and yes, a factory reset will work.
The Bottom Line
This Google Pixel 8 Pro FRP bypass article gives an insight into the methods you can use to remove the FRP lock. However, if you have a other Android brand phone, the best one of all methods is using Dr.Fone - Screen Unlock (Android) . It delivers solutions for those who don’t know the OS variant of their phone. Its interface is easy to understand and has clear instructions. Moreover, bypassing the FRP lock is just a matter of a few minutes for it.
Step-by-Step Tutorial: How To Bypass Google Pixel 8 Pro FRP
Smartphones are now integral to people’s daily lives. In recent days Google Pixel 8 Pro has gained immense popularity. It is due to the Google Pixel 8 Pro device’s impressive features and affordability. The rising cybercrimes have forced manufacturers to increase measures for device security. One such security feature is the Factory Reset Protection (FRP) on the Google Pixel 8 Pro. It is designed to safeguard the Google Pixel 8 Pro device from unauthorized access.
While this feature has its advantages, it can pose a significant challenge when users. This is especially the case when they need to perform a factory reset but have forgotten their Google account credentials. In this comprehensive tutorial for 2023, we will guide you step by step on how to bypass the Google Pixel 8 Pro FRP.
Part 1: Understanding the Google Pixel 8 Pro FRP
Having a clear understanding of what exactly Google Pixel 8 Pro FRP entails is important. It will make the process of the Google Pixel 8 Pro FRP bypass easier and hassle-free. In this section, we will explore the concept of FRP, its purpose, and how it is activated on the Google Pixel 8 Pro:
What is Google Pixel 8 Pro FRP?
FRP, or Factory Reset Protection, is a security feature integrated into Android devices. It is also included on the Google Pixel 8 Pro by Google to prevent unauthorized access to the Google Pixel 8 Pro device. When FRP is activated on a smartphone, it links the Google Pixel 8 Pro device to the user’s Google account.
That makes it mandatory to verify the account credentials after performing a hard reset. In other words, FRP acts as a protective barrier. It ensures only the rightful owner can access the Google Pixel 8 Pro device.
Purpose of Google Pixel 8 Pro FRP
The primary purpose of Google Pixel 8 Pro FRP is to safeguard personal data and sensitive information stored on the Google Pixel 8 Pro device. It works as an important security measure in the unfortunate event of the Google Pixel 8 Pro device being lost or stolen. FRP ensures that no unauthorized individual can gain access to the Google Pixel 8 Pro device’s contents. It does that by requiring the original owner’s Google account login details.
By requiring the user’s Google account credentials, FRP reduces the chances of device misuse. Thus, it ultimately enhances the data security and privacy of your device.
Activation Methods of Google Pixel 8 Pro FRP
When you register a Google account on your device, the FRP gets activated automatically. If you remove the Google account from the Google Pixel 8 Pro device before performing a factory data reset, the FRP will be disabled. However, once the FRP is enabled, it will stop you from using your Google Pixel 8 Pro after a factory data reset in an untrusted environment.
In simple words, any other way to factory reset the Google Pixel 8 Pro device except factory reset through settings will trigger FRP lock. A command example of this is a hard factory reset which usually enables FRP lock after the process.
Part 2: Preparations Before Bypassing Google Pixel 8 Pro FRP
Now that you have a comprehensive understanding of the Google Y12 FRP bypass, it’s time to prepare for the bypassing process. This section will cover crucial preparations to ensure a successful FRP bypass . By following these steps, you can avoid potential failures:
1. Important Notes and Warnings
Before proceeding with the Google Pixel 8 Pro FRP bypass, there are some essential things to keep in mind:
- Legal and Ethical Use: It is crucial to emphasize that bypassing FRP should only be done on devices that you own. Engaging in unauthorized bypassing FRP for illegal purposes may lead to legal consequences.
- Warranty Void: Bypassing FRP may void the warranty of your device. If your Google Pixel 8 Pro is still under warranty, consider contacting the manufacturer or authorized service center for help.
- Security Risks: Bypassing FRP can potentially expose your device to security risks. Only follow trusted guides and sources to avoid installing malicious software.
2. Required Tools and Equipment
To bypass Google Pixel 8 Pro FRP, you will need the following tools and equipment:
- A desktop computer or laptop with strong internet connectivity.
- A USB cable to connect your Google Pixel 8 Pro to the computer.
- Access to third-party software for bypassing FRP.
3. Backup Your Data
If you have recently bought a used Google Pixel 8 Pro and don’t know the Google account credentials, it can trigger FRP on factory reset. Before factory resetting your device, it is essential to back up the data. Since the Google account on your device doesn’t belong to you, you will need to use third-party tools to create local backups.
The best tool in this scenario to use is Wondershare Dr.Fone . With the help of this tool, you can back up the entire data of your Google Pixel 8 Pro to your computer.
4. Ensure a Stable Internet Connection
A stable and reliable internet connection is vital for a smooth FRP bypass. Make sure your computer and Google Pixel 8 Pro are connected to the internet throughout the process. FRP bypassing will need you to download related files to complete the procedure.
Part 3: Step-by-Step Guide: How To Bypass Google Pixel 8 Pro FRP
With the necessary preparations, it’s time to embark on the step-by-step guide for the Google Y15 FRP bypass. This section will explore three different methods for bypassing FRP. The first method involves using your Google account credentials, the official way to bypass FRP:
Method 1: Using Google Account Credentials
Before attempting this method, ensure that you have access to the Google account associated with your Google Pixel 8 Pro. If you’ve forgotten your account details, use Google’s account recovery options before proceeding. Here’s how to bypass Google Pixel 8 Pro FRP using your Google account credentials:
- Step 1: Power on your Google Pixel 8 Pro and choose the desired language. Afterward, connect your phone to a stable Wi-Fi network. Next, proceed through the Google Pixel 8 Pro device setup until you reach the FRP verification screen.
- Step 2: When prompted to verify your Google account, enter the associated email address and password. Ensure that you have a working and high-speed Wi-Fi connection during this step.
- Step 3: After entering the correct Google account credentials, the Google Pixel 8 Pro device will verify the information. If the details are correct, FRP will be bypassed, and you will gain access to your Google Pixel 8 Pro.
Method 2: Using FRP Bypass Tools
To bypass the FRP on Google Pixel 8 Pro, you can utilize a specialized tool designed for this purpose. One highly recommended tool is Wondershare Dr.Fone . It is known for its reliability in bypassing FRP locks on various Android devices. This tool supports 15+ different brands with 2000+ Android devices for FRP bypassing.
Apart from bypassing the FRP lock, this tool is also an expert in unlocking other device locks. These include PIN, pattern, password, fingerprint, and face locks. With the help of this tool, you can unlock Samsung and LG devices without data loss. Here are the step-by-step instructions to perform the Google Pixel 8 Pro FRP bypass:
![]()
Dr.Fone - Screen Unlock (Android)
The Best UnlockJunky Alternative to Bypass FRP and Solve Your Screen Locks
- Completely unlinked from the previous Google account, it won’t be traced or blocked by it anymore.
- Remove all Android screen locks (PIN/pattern/fingerprints/face ID) in minutes.
- Almost all Samsung phones and tablets are supported (Currently for Android 6-13).
- Provide specific removal solutions to promise good success rate.
4,008,672 people have downloaded it
- Step 1: Access Screen Unlock in Wondershare Dr.Fone
Start by installing Wondershare Dr.Fone on your computer, then launch the application. Afterward, navigate to the “Toolbox” tab and select “Screen Unlock.” Follow it by clicking on “Android” on the next screen. Choose “Remove Google FRP Lock” among the available options for screen unlocking.
- Step 2: Select Remove Google FRP Lock To Proceed
On the following screen, select “Vivo” as the targeted phone brand and click “Start.” Wondershare Dr.Fone will now download the necessary driver required for Google Pixel 8 Pro FRP bypassing.
- Step 3: Complete the Google Pixel 8 Pro FRP Bypass Process
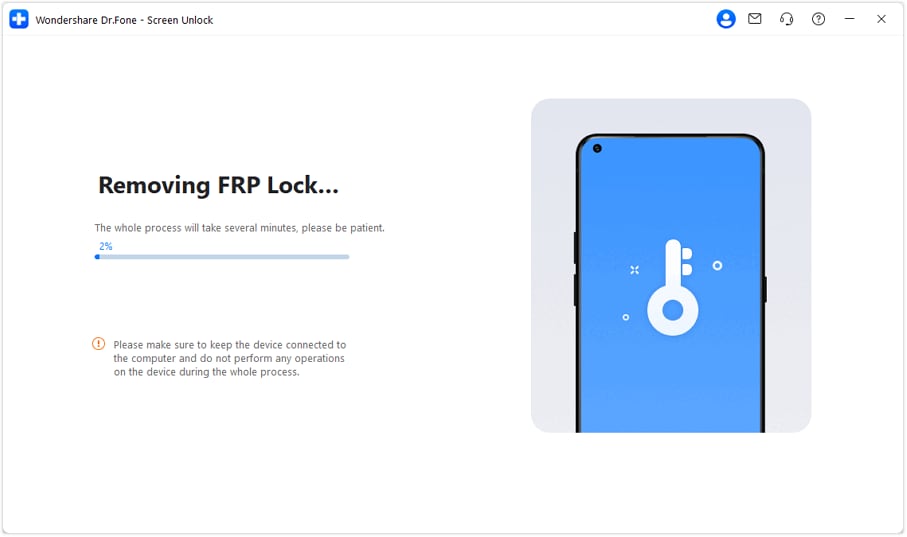
Once the driver download is complete, turn off your Google Pixel 8 Pro smartphone. Now, connect the turned-off device to your computer while simultaneously pressing both volume keys for at least 3 seconds. This action will trigger the FRP bypass process, which should take a few minutes to complete.
Method 3: Using Combination File
The third method on the list for Google Pixel 8 Pro FRP bypass is using a combination file. In this method, you will need to use a specialized tool to bypass the FRP lock by putting your Google Pixel 8 Pro phone into Recovery Mode. The detailed steps for this method are following:
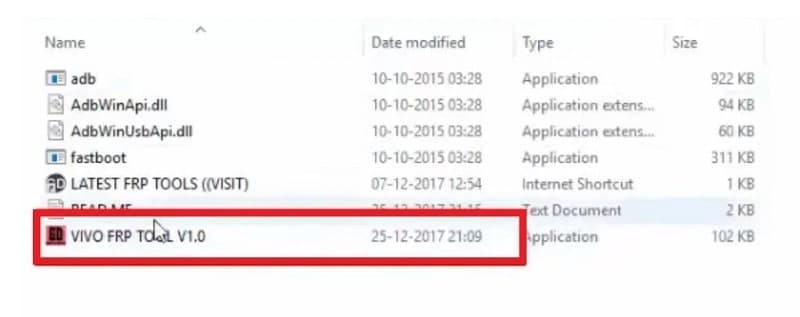
- Step 1: Begin by downloading the Google FRP unlock tool (Password: GADGETSDOCTOR) on your computer and extract it. Now run the .exe file from the extracted content to install it. Afterward, turn off your Google Pixel 8 Pro and put it into Recovery Mode.
- Step 2: To put Google Pixel 8 Pro into Recovery Mode, you will need to simultaneously press and hold the “Power” and “Volume Up” keys together. Hold these keys until you see Fastboot Mode on the screen. Here use the Volume keys to select Recovery Mode.
- Step 3: Within Recovery Mode, select “Advanced Options,” and on the following screen, choose “Reboot with adb.” Now wait for your phone to turn on and later connect it to the computer with FRP unlock tool installed.
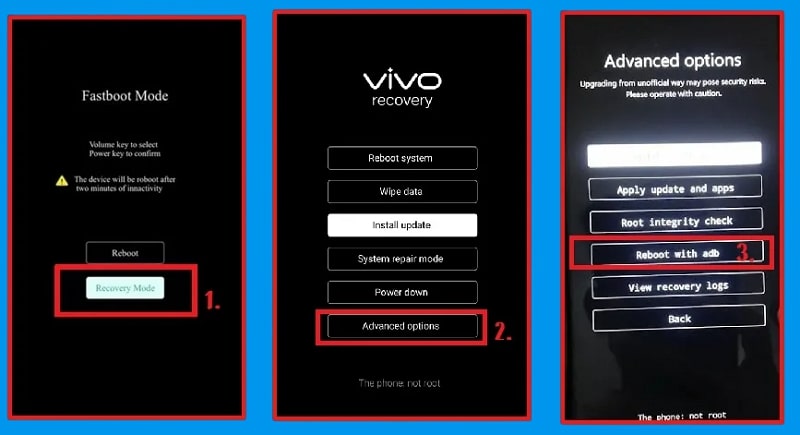
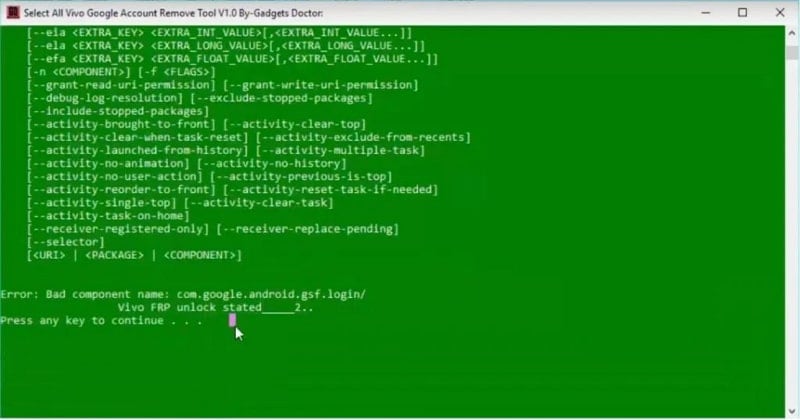
- Step 4: On the Google FRP lock tool interface, tap any key and press enter to check if your device is properly connected. Now repeat the process once again and wait for your Google Pixel 8 Pro to reboot. Once the rebooting process is completed, check to confirm if the FRP lock has been bypassed.
Part 4. Troubleshooting and Tips
Navigating the workings of the Google Pixel 8 Pro FRP bypass can be challenging. As with any security feature, FRP is designed to protect your data and device. It makes the bypassing process a delicate task. This part will address common issues faced during FRP bypass attempts.
It will also offer valuable tips to ensure a successful process. Moreover, it will explore alternative methods should the initial approaches prove unsuccessful.
Common Issues Faced During Bypassing Google Pixel 8 Pro FRP
- Incorrect Google Account Credentials: One of the most common issues during FRP bypass is entering incorrect Google account credentials. Double-check the email address and password associated with the Google Pixel 8 Pro device.
- Unstable Internet Connection: A stable internet connection is crucial during the FRP bypass process. Ensure your device is connected to the internet throughout the procedure and it is not unstable.
- Outdated Software: Using outdated or incompatible tools may result in unsuccessful bypass attempts. Always ensure you are using the latest version of the tool or method.
- Device Compatibility: Not all bypass methods are universally compatible with all Android devices. Ensure that the method you choose is intended for use with the Google Pixel 8 Pro.
Tips To Ensure a Successful Bypass Process
- Back-Up Data: Before attempting any bypass method, back up your important data because it will prevent accidental loss during the process.
- Verify Official Methods: Always focus on official methods, such as using Google account credentials. They are better than third-party tools or combination files.
- Use Reputable Sources: If you opt for alternative tools or methods, download them from reputable sources. It will help you avoid malware or security risks.
- Read User Reviews: If using third-party tools, read user reviews and forums. This will help you gauge their effectiveness and safety.
- Follow Instructions Carefully: Whether using official methods or alternative tools, follow instructions diligently to avoid mistakes.
Alternative Methods or Tools if the Initial Methods Fail
If the initial methods discussed in this article are failed to bypass the Google Pixel 8 Pro FRP, then try these alternate methods to turn off the FRP lock:
1. Contact the Original Owner for Google Account Credentials
If you have bought the Google Pixel 8 Pro in used condition and it is FRP-locked, try contacting the original owner. They might have the necessary account information to complete the verification process. In case they are able to provide you with Google account credentials, the process to bypass the Google Pixel 8 Pro FRP lock becomes easy and quick.
2. Contact Google Customer Services
Have you tried various methods to bypass FRP on your Google Pixel 8 Pro without success? It is the right time to contact professionals. Get in touch with Vivo’s official customer services or visit an authorized service center. They have the expertise to handle device-related issues, including FRP lockouts. Explain your situation to the support staff, and they will guide you through the appropriate steps to regain access.
Conclusion
In this comprehensive guide, we have explored various methods for the Google Pixel 8 Pro FRP bypass. While there are several methods available, we highly recommend using the Wondershare Dr.Fone as the best choice. Dr.Fone is a reputable and reliable tool that offers a seamless and secure FRP bypass process.
It prioritizes data integrity and user privacy. Moreover, its clean interface ensures that even users with limited tech knowledge can use the bypassing process with ease.
Also read:
- [New] The Pro Gamer's Screen Capture Strategy for Xbox One for 2024
- Convert Videos Effortlessly with WinX Pro: MP4, MP3 Support Included
- Dealing with Absent Wmvcore.dll: Effective Strategies and Fixes
- Eliminate Black Screen Glitches for a Smooth Gameplay Experience with Far Cry 6
- Hassle-Free Ways to Remove FRP Lock from Vivo X100 Pro Phones with/without a PC
- How to share/fake gps on Uber for Infinix Smart 7 HD | Dr.fone
- In 2024, 5 Quick Methods to Bypass Samsung Galaxy A05s FRP
- In 2024, Is GSM Flasher ADB Legit? Full Review To Bypass Your Vivo Y78+FRP Lock
- The 10 Premier Online Church Service Providers
- The Synergy of Content and Platform for Peak Performance for 2024
- Two Ways to Sync Contacts from Honor X9b to Gmail | Dr.fone
- Ultimate Guide from Vivo V30 FRP Bypass
- Ultimate Guide on Honor X7b FRP Bypass
- Unveiling Performance: A Thorough Review on the Asus RT-AC68U for Swift & Secure Wi-Fi Connectivity
- Title: A Step-by-Step Guide on Using ADB and Fastboot to Remove FRP Lock from your Google
- Author: Lynn
- Created at : 2024-11-13 09:13:54
- Updated at : 2024-11-17 13:43:13
- Link: https://bypass-frp.techidaily.com/a-step-by-step-guide-on-using-adb-and-fastboot-to-remove-frp-lock-from-your-google-by-drfone-android/
- License: This work is licensed under CC BY-NC-SA 4.0.